

 1 votes
2002 SM build
Posted by
Jim Drago
,
12-13-2011
·
7,243 views
12/13
After seeing a few 2001 up cars running pretty strong, we decided to throw our hat in and try one as well. Naturally, I think we can do better, just like everyone else This was a very straight and clean donor. Came from the north ( Chicago), so a little surface rust and sub frame rust on the bottom, but overall, very clean and very straight. Will be real nice when all cleaned up and painted. We won't have to paint the exterior as the paint is real nice, except a few scuffs on frt and rear bumper. That should speed up the build a little bit. After stripping and painting the underside of the last car, it looked too good not to do it again. Lots of work that doesn't make eh car any faster. We have the car back from the cage builders( Notice dash bar
  ) yesterday and we started stripping. Hopefully we will get the interior and the underside painted this week and start assembling the car next week.
Here are some pictures...


Here are some after we got it back from the cage builders and started stripping.. Removing the sound deadening can be a real mess ...


 [attachment=231113:IMG_0299.JPG]

OK, for all those conspiracy theorists who claim 20 + lbs of undercoat, seam sealer and insulation pads.. We removed this stuff again from the build ( for cosmetic and fire proofing reasons, not weight) The underside was 3.25 lbs and the interior was just under 2 lbs. So all of it is less than 5.5 lbs now on two 99 up cars, back to back. It sure does make a mess though Sometimes dry ice is easier to remove the tar pads, we just buzzed these off.
Here a re a few more pictures...


12/17
The guys did well this week, they got the car completely stripped and the interior painted and the underside painted. We fumbled around wondering what was the best way to paint it? We decided to just do it all at once. We fumbled around with the dash bar, took it back out to paint as it was only tacked in place. We will re install heater boxes and defrost vents and re install permanently. We are also having some pockets fabbed for those that want to notch the tunnel. I figured we could do something nice and inexpensive and offer it for same for those that also want to notch the tunnel, but don't have the ability to fab the pocket or the charged a lot by someone who does. I should have a picture up soon.
We have some touch up to do, so notching the floor after and painting the bar after isn't a big deal, but certainly doesn't make much sense either:(
Here is where we are today, not working today, but we are fitting this car in between jobs. By the end of the week, it should be a roller with the dash and all the sheet metal re installed.


12/26
Havent worked on this car for last week or so, we are getting cars prepped and ready for Sebring, we should start up again next week after the cars leave for Florida.
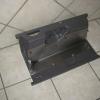
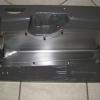
Here are a few pictures of the tunnel notch out panel we made. We will rivet this one in, most are welded in, but either works well.


After seeing a few 2001 up cars running pretty strong, we decided to throw our hat in and try one as well. Naturally, I think we can do better, just like everyone else
Here are some pictures...


Here are some after we got it back from the cage builders and started stripping.. Removing the sound deadening can be a real mess ...


 [attachment=231113:IMG_0299.JPG]

OK, for all those conspiracy theorists who claim 20 + lbs of undercoat, seam sealer and insulation pads.. We removed this stuff again from the build ( for cosmetic and fire proofing reasons, not weight) The underside was 3.25 lbs and the interior was just under 2 lbs. So all of it is less than 5.5 lbs now on two 99 up cars, back to back. It sure does make a mess though
Here a re a few more pictures...


12/17
The guys did well this week, they got the car completely stripped and the interior painted and the underside painted. We fumbled around wondering what was the best way to paint it? We decided to just do it all at once. We fumbled around with the dash bar, took it back out to paint as it was only tacked in place. We will re install heater boxes and defrost vents and re install permanently. We are also having some pockets fabbed for those that want to notch the tunnel. I figured we could do something nice and inexpensive and offer it for same for those that also want to notch the tunnel, but don't have the ability to fab the pocket or the charged a lot by someone who does. I should have a picture up soon.
We have some touch up to do, so notching the floor after and painting the bar after isn't a big deal, but certainly doesn't make much sense either:(
Here is where we are today, not working today, but we are fitting this car in between jobs. By the end of the week, it should be a roller with the dash and all the sheet metal re installed.


12/26
Havent worked on this car for last week or so, we are getting cars prepped and ready for Sebring, we should start up again next week after the cars leave for Florida.
Here are a few pictures of the tunnel notch out panel we made. We will rivet this one in, most are welded in, but either works well.


 Sign In
 Create Account


