


 Sign In
 Create Account
Just finished brushing POR 15 on a rear sub-frame and I agree.


Duncan's Winter Projects

Started by
Duncan
, 11-20-2012 12:46 AM
#21

 Posted 11-27-2012 05:41 PM
Adax
-
- Members
-

- 208 posts
Member
- Location:Atlanta
- Region:ATL
- Car Number:49
 Back to top
 Report
#22
Posted 11-27-2012 06:15 PM
Duncan
-
- Members
-
- 251 posts
Member
Just finished brushing POR 15 on a rear sub-frame and I agree.
What color did you use?
Duncan


#23
Posted 11-27-2012 07:34 PM
Adax
-
- Members
-
- 208 posts
Member
- Location:Atlanta
- Region:ATL
- Car Number:49
What color did you use?
Duncan
Black - but it probably is a better color for showing imperfections.


#24
Posted 11-27-2012 09:09 PM
Alberto
-

- Members
-
- 1,471 posts
Veteran Member
- Location:Mountain View, CA
- Region:SFR
- Car Year:1990
Just finished brushing POR 15 on a rear sub-frame and I agree.
I also did brush-on POR 15 when I replaced the 1.6 rear subframe with a 1.8 rear subframe during my build. PITA. Spray paint is easier to get into all the nooks and crannies of the subframe.
I was going to do the front subframe in POR 15 as well. Glad I didn't since I had to replace it already...
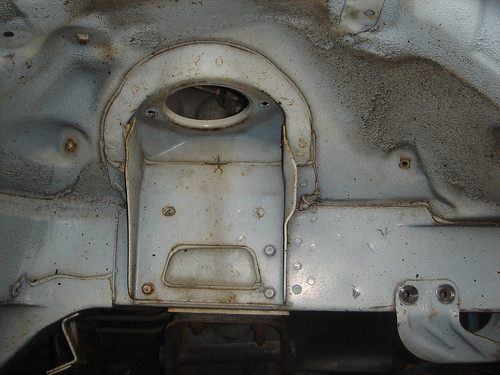
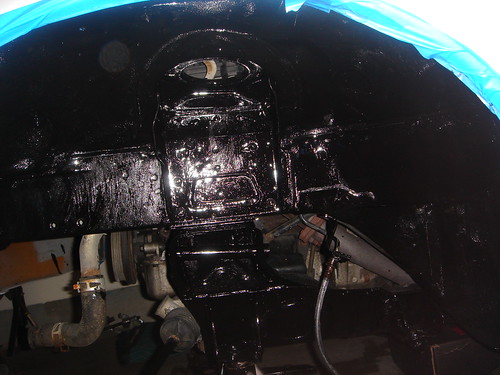
I also did this to my inner fenders to clean up some surface rust.
Before:
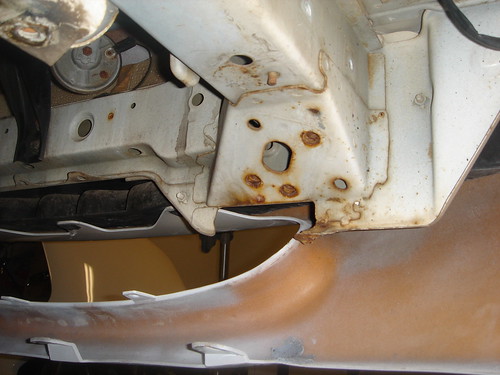
during:
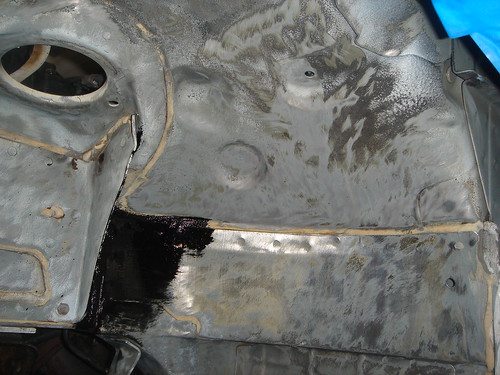
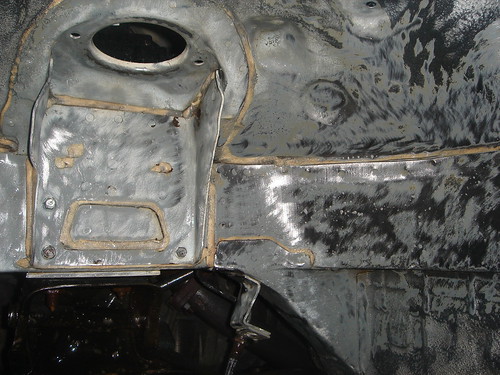
after:
#25
Posted 11-28-2012 07:26 AM
LarryKing
-
- Members
-
- 2,659 posts
Veteran Member
#26
Posted 11-28-2012 08:34 AM
Bench Racer
-
- Members
-
- 5,508 posts
Different strokes for different folks : )
- Location:Wauwatosa, WI
- Region:Milwaukee
- Car Year:1990
- Car Number:14
Can't decide on the color of the subframes. Torn between gray and black. Any thoughts? The black's a little easier to paint but I thought the gray might be an interesting contrast. I have both paints on hand.
Duncan
If you like contrast, you need to view Mr. Pink's sub-frames.

#27
Posted 11-28-2012 09:18 AM
Keith Andrews
-

- Members
-
- 732 posts
Veteran Member
- Location:FL450
- Region:CCR, SE
- Car Year:1999
- Car Number:26
Here are the clips/spring sets front and rear from Mazda. I was told they are dealer kits and not listed for some reason.
NAY5-33-29Z -MV
BCYF-26-49ZA-MV
NAY5-33-29Z -MV
BCYF-26-49ZA-MV
#28
Posted 11-28-2012 10:28 AM
Alberto
-
- Members
-
- 1,471 posts
Veteran Member
- Location:Mountain View, CA
- Region:SFR
- Car Year:1990
Good Lord - who's got that kind of time?
I did at the time (tail end of the recession when things were slow). I don't now.
#29
Posted 11-29-2012 12:30 AM
Ron Alan
-
- Members
-
- 3,732 posts
Veteran Member
- Location:Northern CA
- Car Year:1995
Glad to hear things are so much betterI did at the time (tail end of the recession when things were slow). I don't now.

Ron
RAmotorsports
#30
Posted 11-29-2012 10:07 PM
Duncan
-
- Members
-
- 251 posts
Member
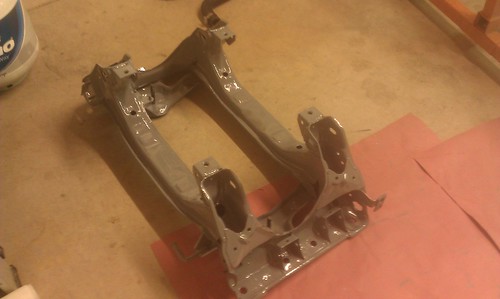
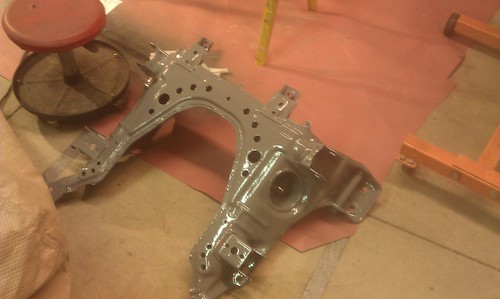
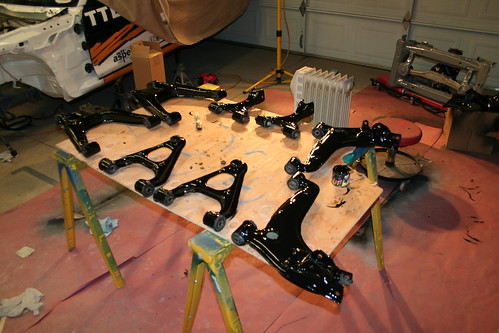
Decided to go gray with the subframes. Will paint the other side tomorrow.
IMAG0247 by duncanrellis, on Flickr
IMAG0248 by duncanrellis, on Flickr
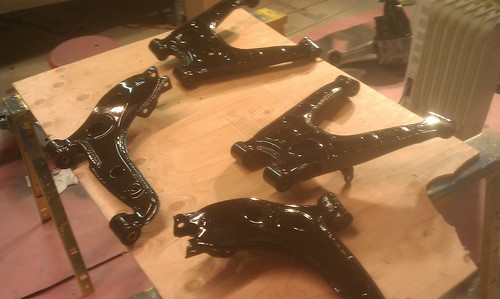
Shinier control arms.
IMAG0249 by duncanrellis, on Flickr
Next need to start moving things from this....
IMAG0250 by duncanrellis, on Flickr
to this....
IMAG0251 by duncanrellis, on Flickr
Duncan
IMAG0247 by duncanrellis, on Flickr
IMAG0248 by duncanrellis, on Flickr
Shinier control arms.
IMAG0249 by duncanrellis, on Flickr
Next need to start moving things from this....
IMAG0250 by duncanrellis, on Flickr
to this....
IMAG0251 by duncanrellis, on Flickr
Duncan

#32
Posted 12-02-2012 09:22 PM
Duncan
-
- Members
-
- 251 posts
Member
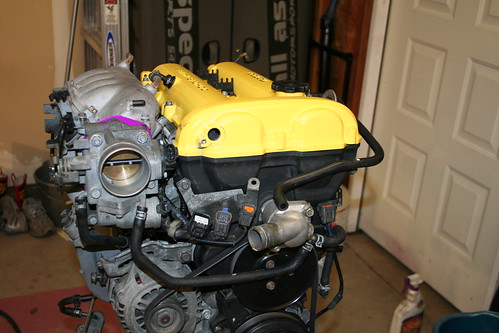
A little more progress today.
New motor mounts
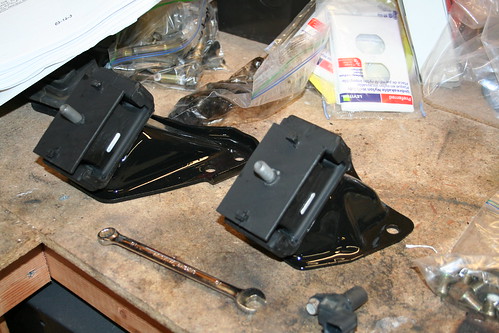
IMG_5714 by duncanrellis, on Flickr
Steering sensor bracket
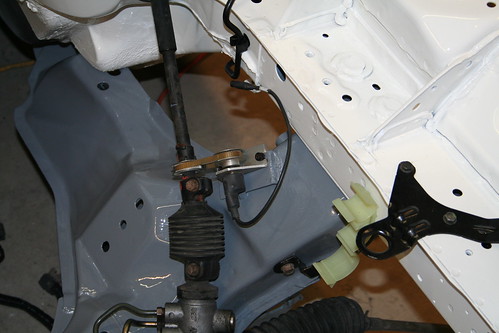
IMG_5713 by duncanrellis, on Flickr
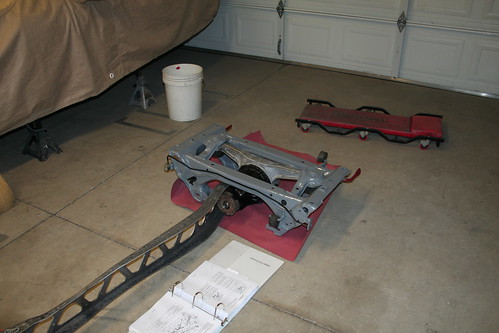
Subframe installed back with steering rack. Almost ready to get the engine back in.
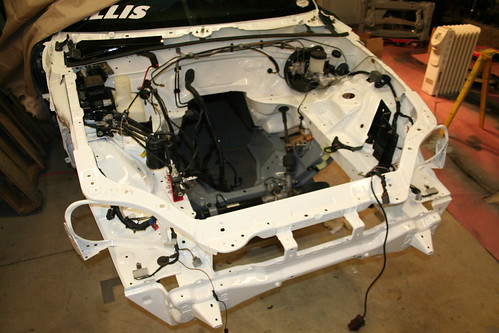
IMG_5712 by duncanrellis, on Flickr
Rear diff installed back in rear subframe.
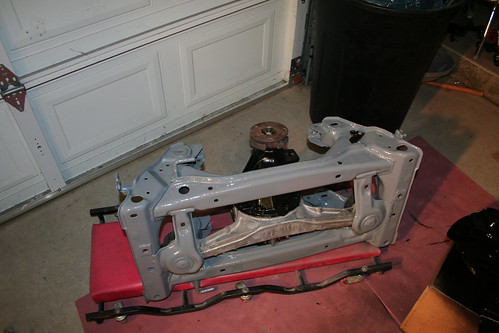
IMG_5711 by duncanrellis, on Flickr
All buttoned up and ready to be installed.
IMG_5709 by duncanrellis, on Flickr
Shiny control arms.
IMG_5708 by duncanrellis, on Flickr
-Duncan
New motor mounts
IMG_5714 by duncanrellis, on Flickr
Steering sensor bracket
IMG_5713 by duncanrellis, on Flickr
Subframe installed back with steering rack. Almost ready to get the engine back in.
IMG_5712 by duncanrellis, on Flickr
Rear diff installed back in rear subframe.
IMG_5711 by duncanrellis, on Flickr
All buttoned up and ready to be installed.
IMG_5709 by duncanrellis, on Flickr
Shiny control arms.
IMG_5708 by duncanrellis, on Flickr
-Duncan
#33
Posted 12-05-2012 06:45 PM
Duncan
-
- Members
-
- 251 posts
Member
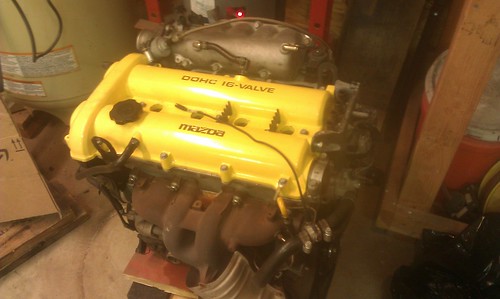
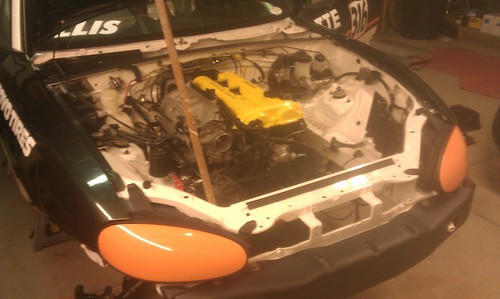
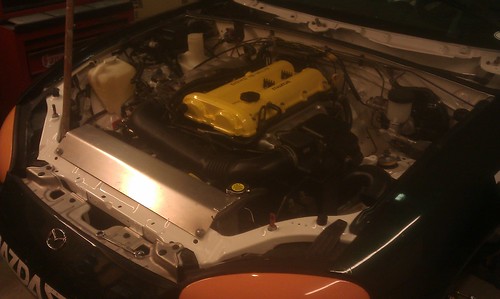
Powertrain back in the car. Had a friend come over this morning to help and we put the engine, rear subframe, driveshaft and exhaust back in the car. I spent the afternoon cleaning up the wiring and doing some other little things. Pictures below.
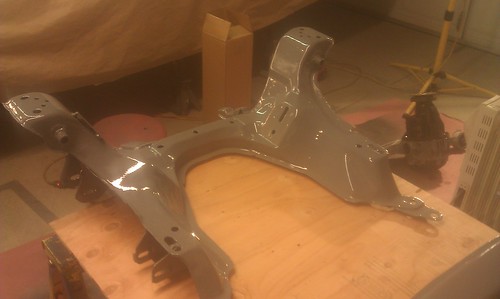
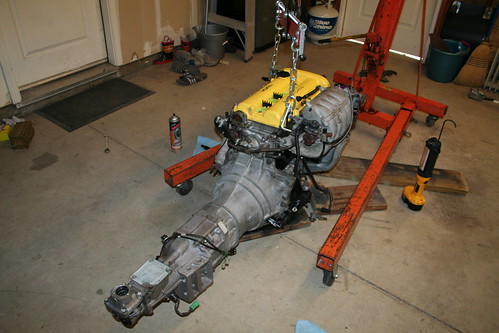
Assembled rear subframe and powerplant frame ready to go back in the car.
IMG_5715 by duncanrellis, on Flickr
Rebuilt the front hubs and replaced the studs
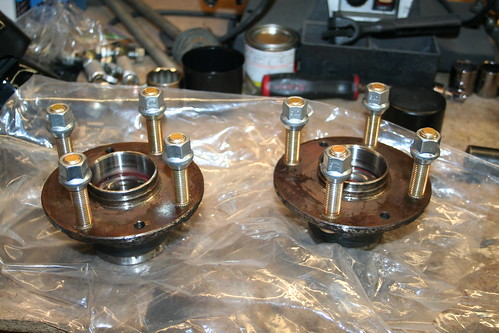
IMG_5716 by duncanrellis, on Flickr
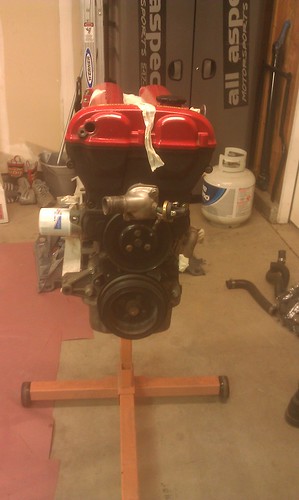
New clutch and flywheel.
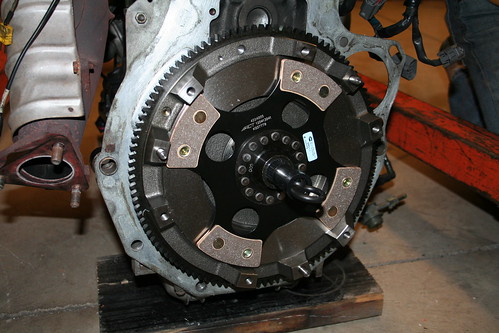
IMG_5717 by duncanrellis, on Flickr
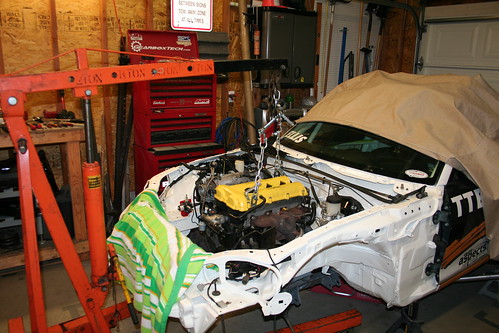
Getting ready to go back in
IMG_5719 by duncanrellis, on Flickr
Carefully does it...
IMG_5720 by duncanrellis, on Flickr
That's more like it.
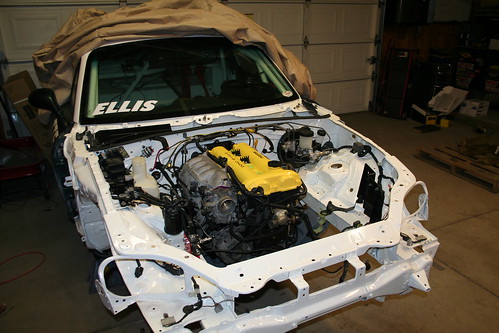
IMG_5722 by duncanrellis, on Flickr
Onto reinstalling the suspension and brakes. Then I'll put the front panels back on and it's time for setup and dyno time. That, and a new windshield.
Duncan
Assembled rear subframe and powerplant frame ready to go back in the car.
IMG_5715 by duncanrellis, on Flickr
Rebuilt the front hubs and replaced the studs
IMG_5716 by duncanrellis, on Flickr
New clutch and flywheel.
IMG_5717 by duncanrellis, on Flickr
Getting ready to go back in
IMG_5719 by duncanrellis, on Flickr
Carefully does it...
IMG_5720 by duncanrellis, on Flickr
That's more like it.
IMG_5722 by duncanrellis, on Flickr
Onto reinstalling the suspension and brakes. Then I'll put the front panels back on and it's time for setup and dyno time. That, and a new windshield.
Duncan
#34
Posted 12-05-2012 06:58 PM
Bench Racer
-
- Members
-
- 5,508 posts
Different strokes for different folks : )
- Location:Wauwatosa, WI
- Region:Milwaukee
- Car Year:1990
- Car Number:14

#35
Posted 12-09-2012 10:23 PM
Duncan
-
- Members
-
- 251 posts
Member
Got mostly wrapped up today. All that's left is to reinstall the brakes and do the alignment and dyno tune.
More pictures
Suspension installed.
481808_10151176827681169_1044905720_n by duncanrellis, on Flickr
Body panels all laid out.
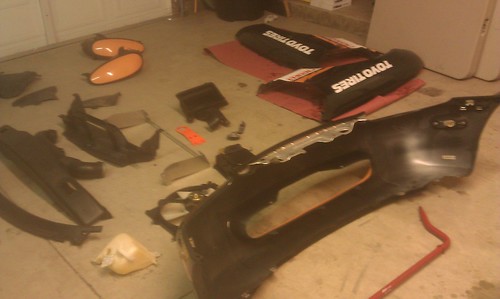
IMAG0260 by duncanrellis, on Flickr
Starting to put pieces back on
IMAG0261 by duncanrellis, on Flickr
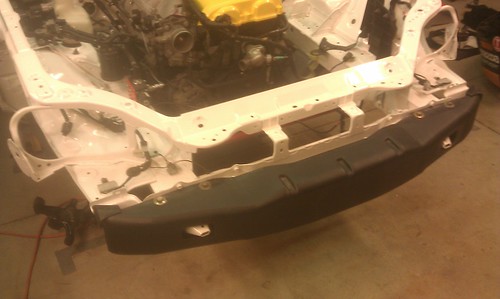
Initial alignment of the hood.
IMAG0262 by duncanrellis, on Flickr
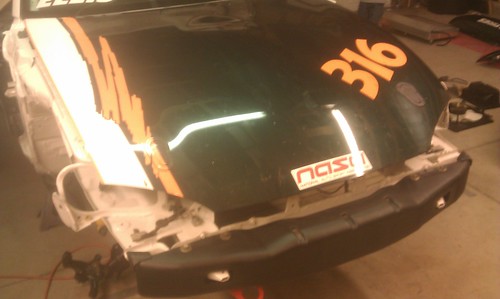
Let's add some fenders and headlights.
IMAG0263 by duncanrellis, on Flickr
After some alignment.
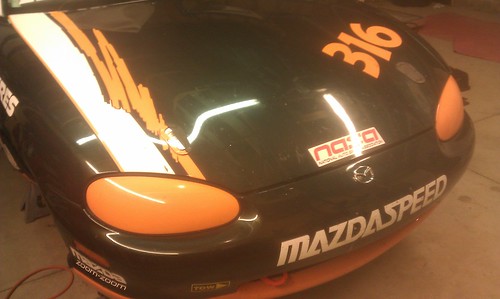
IMAG0264 by duncanrellis, on Flickr
All buttoned up on the inside.
IMAG0266 by duncanrellis, on Flickr
Next up is wiring the coolant pressure sensor. I'm using an NC relay so I can have a green lights when the system is pressurized, and a red light when it's not.
-Duncan
More pictures
Suspension installed.
481808_10151176827681169_1044905720_n by duncanrellis, on Flickr
Body panels all laid out.
IMAG0260 by duncanrellis, on Flickr
Starting to put pieces back on
IMAG0261 by duncanrellis, on Flickr
Initial alignment of the hood.
IMAG0262 by duncanrellis, on Flickr
Let's add some fenders and headlights.
IMAG0263 by duncanrellis, on Flickr
After some alignment.
IMAG0264 by duncanrellis, on Flickr
All buttoned up on the inside.
IMAG0266 by duncanrellis, on Flickr
Next up is wiring the coolant pressure sensor. I'm using an NC relay so I can have a green lights when the system is pressurized, and a red light when it's not.
-Duncan
#36
Posted 12-09-2012 10:33 PM
SaulSpeedwell
-
- Members
-
- 792 posts
Veteran Member
- Location:NEOhio
Found this today when I removed the rear calipers. Need to have a closer look at the caliper and see why this might of happened.
IMAG0243 by duncanrellis, on Flickr
Duncan
Happens when you cock the pad on install, or if the backing plates fit too tight in the caliper, etc. Always something with the pad/caliper interface, I've never seen any other cause.
Run clips, replace or rotate them when they get dimpled, file the backing plates so they slide freely, don't use grease. RTV the clips to the caliper with high-temp RTV, makes life easier.
For faster reply than PM: miataboxes>>>AT<<<gmail>>DOT<<<com
#37
Posted 12-09-2012 10:37 PM
SaulSpeedwell
-
- Members
-
- 792 posts
Veteran Member
- Location:NEOhio
Got mostly wrapped up today. All that's left is to reinstall the brakes and do the alignment and dyno tune.
More pictures
Suspension installed.
481808_10151176827681169_1044905720_n by duncanrellis, on Flickr
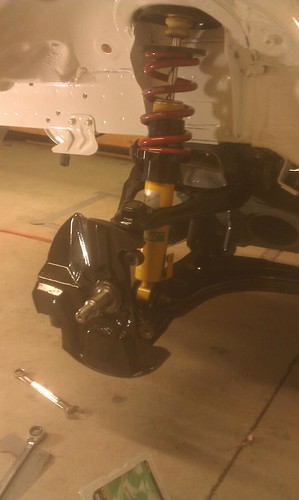
Looking at this and prior photos, I believe you have the springs swapped front and rear.
The laptimer gives no credit for councours subframes, but it will definitely notice the spring swap.
If nothing else, it will be easier to keep this beautiful build from becoming origami if you put the springs on the right end of the car.
For faster reply than PM: miataboxes>>>AT<<<gmail>>DOT<<<com
#38
Posted 12-09-2012 10:40 PM
SaulSpeedwell
-
- Members
-
- 792 posts
Veteran Member
- Location:NEOhio
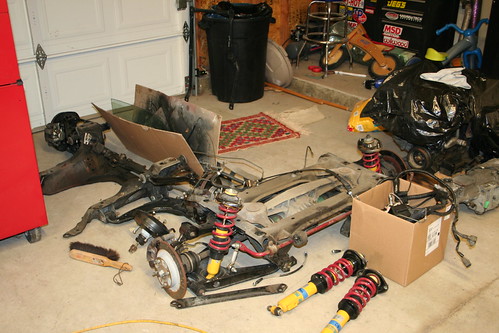
Now it's on to cleaning up the subframes. More pictures to follow.
IMG_5691 by duncanrellis, on Flickr
thanks,
Duncan
Am I right? Photo shows long springs on rear, short springs on front ... should be t'other way around?
For faster reply than PM: miataboxes>>>AT<<<gmail>>DOT<<<com
#39
Posted 12-09-2012 10:44 PM
Duncan
-
- Members
-
- 251 posts
Member
Looking at this and prior photos, I believe you have the springs swapped front and rear.
The laptimer gives no credit for councours subframes, but it will definitely notice the spring swap.
If nothing else, it will be easier to keep this beautiful build from becoming origami if you put the springs on the right end of the car.
The springs are correct. 0700 on the front, 0325 on the rear. It's marked on the springs.
#40
Posted 12-09-2012 11:07 PM
SaulSpeedwell
-
- Members
-
- 792 posts
Veteran Member
- Location:NEOhio
The springs are correct. 0700 on the front, 0325 on the rear. It's marked on the springs.
Ugh, too used to seeing them installed, I guess . . . sorry for the false alarm.
- Glenn likes this
For faster reply than PM: miataboxes>>>AT<<<gmail>>DOT<<<com

0 user(s) are reading this topic
0 members, 0 guests, 0 anonymous users

