

Roll Cage: Trans Tunnel Patch, Driver’s Seat Mount
Posted by
Tom Hampton
,
03-10-2011
·
5,024 views
Hmmm….I’m ready to be done with the cage and move on to something else…like driving it! Oh well, can’t get done if you don’t get started. Onward!
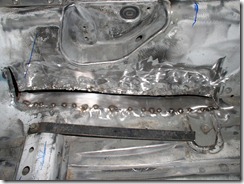
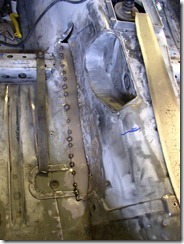
As frequent visitors will know, I had to cut a notch in my transmission tunnel to move the seat far enough away from the upper door bar. Well, in reality it is to move my HEAD away from the door bar. At any rate, its time to patch the holes. The side and bottom of the notch both have a curve to them. So, cutting a single piece and hammering it to “fit†would have been a pain, and probably not very successful. I chose to cut the steel into three pieces: one for the side, one for the bottom, and one to fill the front triangle area.
I used poster board to trace out the patterns, then cut the steel to match. First, I tacked the bottom piece into place. I did this by tacking at one end, and then bending it into place, tacking as I went.


Continue reading Roll Cage: Trans Tunnel Patch, Driver’s Seat Mount
As frequent visitors will know, I had to cut a notch in my transmission tunnel to move the seat far enough away from the upper door bar. Well, in reality it is to move my HEAD away from the door bar. At any rate, its time to patch the holes. The side and bottom of the notch both have a curve to them. So, cutting a single piece and hammering it to “fit†would have been a pain, and probably not very successful. I chose to cut the steel into three pieces: one for the side, one for the bottom, and one to fill the front triangle area.
I used poster board to trace out the patterns, then cut the steel to match. First, I tacked the bottom piece into place. I did this by tacking at one end, and then bending it into place, tacking as I went.


Continue reading Roll Cage: Trans Tunnel Patch, Driver’s Seat Mount


 Sign In
 Create Account


