


 Sign In
 Create Account
Thought I'd share some of my winter projects.
When I built the car back in the winter of 2009 I was on a somewhat compressed time schedule. From the time I got the cage back from the builder until the first track event was only 4 weeks. Because of this, some things I would have liked to do on the build got sidelined, with the biggest being I never cleaned up the ugly dull stock engine bay.
My stock engine (75K) is coming out. Although I live on the West Coast, I'll be moving back East at the end of next summer so I decided to purchase an engine from an east coast builder. A deal on a one weekend old refreshed Rossini motor popped up a few months ago that I couldn't pass up so I made the purchase.
I started by stripping the front of the car. I removed the bumpers, fenders, hood, and both doors. To make some room in the garage, I moved most of this stuff out to the trailer, which has been converted into a storage facility for the winter. My son thought this was great fun.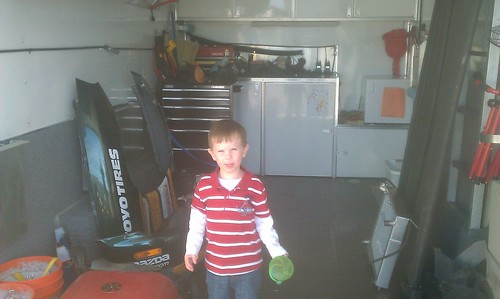
665268_10151141759441169_1416524443_o by duncanrellis, on Flickr
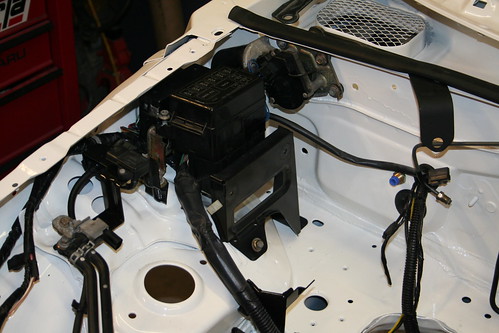
After removal of all the body panels and the radiator, I had a friend come over and we removed the engine, transmission, and both cross members. Sorry, no pictures, but it was very straight forward. Below is a picture of my now empty engine compartment.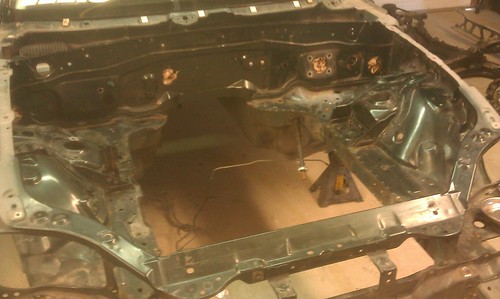
680492_10151149262891169_1045609352_o by duncanrellis, on Flickr
After a few rounds with the degreaser, scrub brushes, and a hose, I managed to remove 10 years of road grime from the front of the car. From then, it was onto scuffing up the surface to prepare for primer. This process is no fun.
Making progress.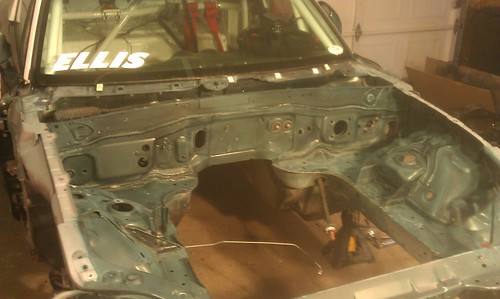
132968_10151150274566169_936386426_o by duncanrellis, on Flickr
More scuffing continued, then cleaning with acetone, and then finally the primer went on.
57532_10151151534026169_1098185966_o by duncanrellis, on Flickr
For the paint, I chose TCP Global's single stage urethane in pure white. I've used them before, and it's a great product at significantly cheaper than the paint store brands (PPG, etc...) After the first coat.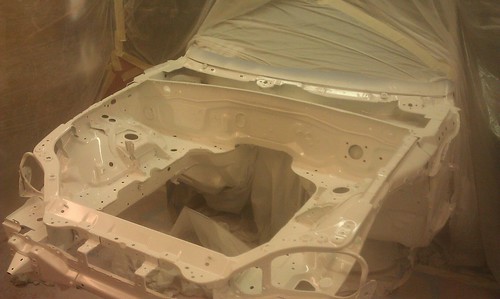
178214_10151151684356169_2117048818_o by duncanrellis, on Flickr
All done with most of the tape off. I'll let this sit for a week to make sure the paint is good and hard before I start reassembly.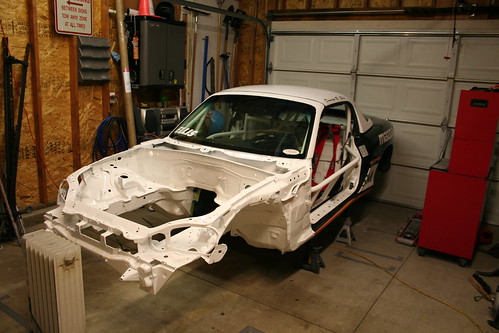
IMG_5689 by duncanrellis, on Flickr
Now it's on to cleaning up the subframes. More pictures to follow.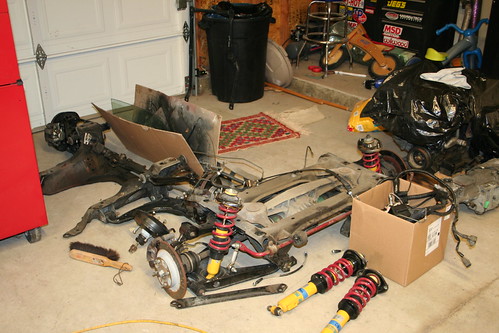
IMG_5691 by duncanrellis, on Flickr
thanks,
Duncan


Duncan's Winter Projects

#1

 Posted 11-20-2012 12:46 AM
-
- Members
-

- 251 posts
Member
- Jason J Ball likes this


 Back to top
 Report
#2
Posted 11-20-2012 07:52 AM
-

- Members
-
- 441 posts
Member
- Location:Reno, NV
- Region:SFR
- Car Year:1991
- Car Number:42
#3
Posted 11-20-2012 05:17 PM
-
- Members
-
- 251 posts
Member
IMAG0243 by duncanrellis, on Flickr
Duncan
#4
Posted 11-20-2012 07:04 PM
-
- Members
-
- 441 posts
Member
- Location:Reno, NV
- Region:SFR
- Car Year:1991
- Car Number:42
#5
Posted 11-20-2012 07:30 PM
-
- Members
-
- 251 posts
Member
Duncan, that is very interesting as I found the exact same thing on my front calipers!!! I have a theory,, do you have the clips in your calipers ?
I do have the clips, but I think the pad got cocked in the slider and the piston bent it. The caliper slides free on a casual inspection. I'll give it a closer look and regrease everything. The slider got a little mangled but I always replace those in the off-season anyway. It must of happened last event because I take the calipers off after every race to inspect the pads.
Duncan
#6
Posted 11-20-2012 07:33 PM
-
- Members
-
- 251 posts
Member
IMAG0245 by duncanrellis, on Flickr
IMAG0244 by duncanrellis, on Flickr
Going to spend tomorrow cleaning and painting some of the smaller parts (brackets, brake booster, etc) in preparation for re-installing everything in the engine compartment.
Duncan
#7
Posted 11-20-2012 10:32 PM
-
- SMembers
-
- 277 posts
Member
- Region:Oregon
- Car Year:1993
- Car Number:51
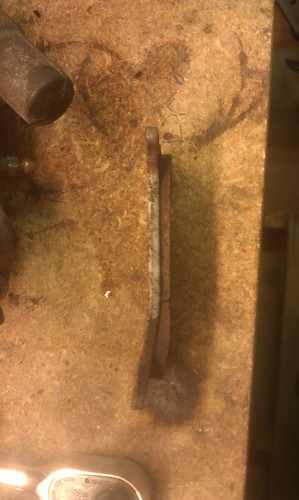
Found this today when I removed the rear calipers. Need to have a closer look at the caliper and see why this might of happened.
IMAG0243 by duncanrellis, on Flickr
Duncan
That's very odd. I can see one crack in the lining but it doesn't line up with the bend. Surprised there isn't massive amounts of liner missing in the vicinity of the bend but that's assuming the lining material isn't flexible or ductile at all.

#8
Posted 11-20-2012 10:38 PM
-
- Moderators
-

- 6,121 posts
Veteran Member
- Location:Fremont, CA
- Region:San Francisco
- Car Year:1999
- Car Number:88
My wild imagination
When you get new pads, do you scrap the paint out in between where they go in.
J~


#9
Posted 11-21-2012 08:29 AM
-
- SMembers
-
- 2,297 posts
Veteran Member
- Location:Beloit, Wi
- Region:Chicago
- Car Year:1999
- Car Number:72
Anti rattle clips help with installation, but here are a couple tips
Install a lug nut to keep the rotor from wobbling
Only remove one caliper bolt, pivot the caliper for removal, on reassembly use one hand to hold the caliper up on the pivot bolt. The other hand holds the pads in place while lowering the caliper
Always check to make sure the pads move freely. A pad that fell out will be bound up tight.
Brakes will feel "odd". They do not pull or anything like that. They just are not right. Once bent, that pad is junk. I have never had pad seperation on a MIata, but I have had it on other cars.
Dave
- Jim Drago likes this
Dave Wheeler
Advanced Autosports, the nations most complete Spec Miata shop
Author, Spec Miata Constructors Guide, version 1 and 2.0
Building Championship winning cars since 1995
4 time Central Division Spec Miata Champion car builder 2012-2013-2014-2017
Back to Back June Sprints Spec Miata 1-2 finishes 2016 and 2017
5 time June Sprints winner in Mazda's
6 Time Northern Conference Champion Car Builder
2014 SCCA Majors National point Champion car builder
2014 SCCA Runoffs winner, T4 (Bender)
2014 Central Division Champion, ITS (Wheeler)
2013 Thunderhill 25 hour winning crew chief
2007 June Sprints winner, (GT1, Mohrhauser)
Over 200 race wins and counting.
www.advanced-autosports.com
dave@advanced-autosports.com
608-313-1230

#10
Posted 11-21-2012 09:20 AM
-

- Administrators
-

- 6,566 posts
East Street Racing / 2 Time National Champion
- Location:Memphis, Tn
- Region:Mid South
- Car Year:2005
- Car Number:2
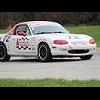
The car looks very nice
Jim
East Street Auto Parts
Jim@Eaststreet.com
800 700 9080


#11
Posted 11-21-2012 11:24 AM
-

- Members
-
- 1,471 posts
Veteran Member
- Location:Mountain View, CA
- Region:SFR
- Car Year:1990
Since you have the drivetrain out and everything is clean, consider adding some DEI Floor and Tunnel Shield along the trans tunnel and in front of the driver's feet at the firewall. Makes a world of difference in keeping the cockpit cool and the driver comfortable.
http://www.designeng...ound-insulation
#12
Posted 11-22-2012 09:55 AM
-
- Members
-
- 251 posts
Member
The pad was not installed properly. Do not ask how I know this !!!!!!
Anti rattle clips help with installation, but here are a couple tips
Install a lug nut to keep the rotor from wobbling
Only remove one caliper bolt, pivot the caliper for removal, on reassembly use one hand to hold the caliper up on the pivot bolt. The other hand holds the pads in place while lowering the caliper
Always check to make sure the pads move freely. A pad that fell out will be bound up tight.
Brakes will feel "odd". They do not pull or anything like that. They just are not right. Once bent, that pad is junk. I have never had pad seperation on a MIata, but I have had it on other cars.
Dave
Thanks Dave,
Do you know if it's possible to buy a hardware kit from Mazda MotorSports? I looked on the site but couldn't find one. I really just want the clips.
Happy Thanksgiving.
Duncan
#13
Posted 11-22-2012 10:00 AM
-
- SMembers
-
- 518 posts
do they sell spec training wheels yet?
- Location:NYC
- Region:NYR
- Car Year:1991
- Car Number:12?
Vick
www.volko.com
Black SM/SM2/"Slap Bracelet Throwback" #12 in the Northeast....if the car was made in the early 90's it should look like it.
1.6L forever! Bring on your '99's and '01's!
#14
Posted 11-22-2012 10:02 AM
-
- Members
-
- 441 posts
Member
- Location:Reno, NV
- Region:SFR
- Car Year:1991
- Car Number:42
#15
Posted 11-22-2012 10:06 AM
-
- Members
-
- 251 posts
Member
Duncan, I've got some extra I can send you
Todd,
Thanks, but I'll pick a set up from Mazda. I've got a few more parts I have to order anyway before this thing is back together.
Duncan
#16
Posted 11-26-2012 05:34 PM
-
- Members
-
- 251 posts
Member
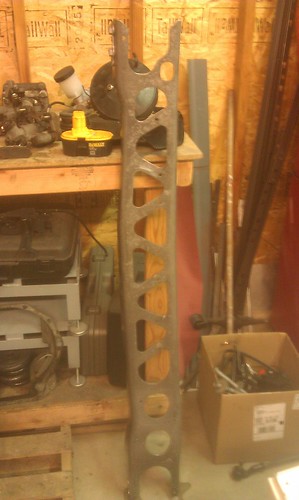
Subframes, plus control arms, mostly prepped for paint.
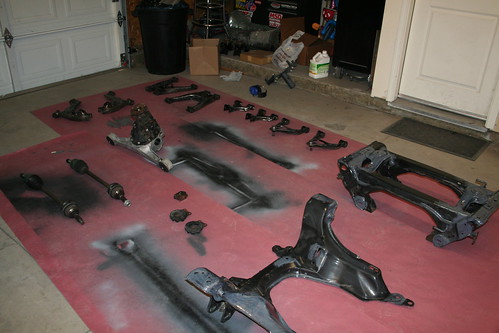
IMG_5702 by duncanrellis, on Flickr
Started the reinstallation of things back in the engine compartment, while being very careful around the still new paint.
IMG_5701 by duncanrellis, on Flickr
Refinished the brake booster, plus a new master cylinder.
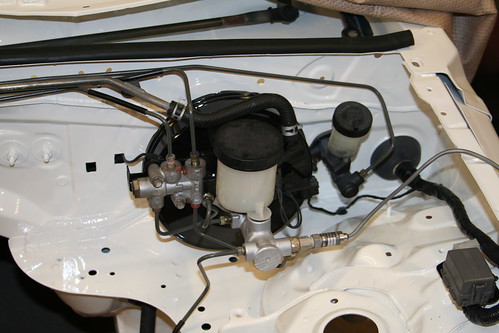
IMG_5700 by duncanrellis, on Flickr
Almost ready to re-install the engine. Still waiting on my clutch from Dave, plus some little odds and ends, but will probably have it back in by the weekend.
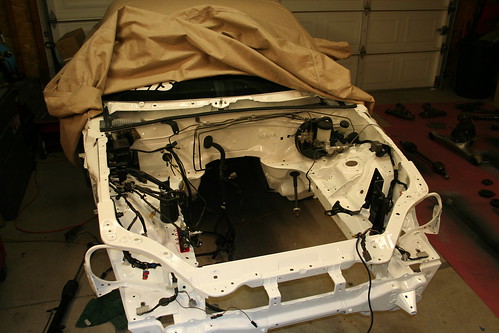
IMG_5699 by duncanrellis, on Flickr
Cleaned up the steering rack the best I could without taking it apart.
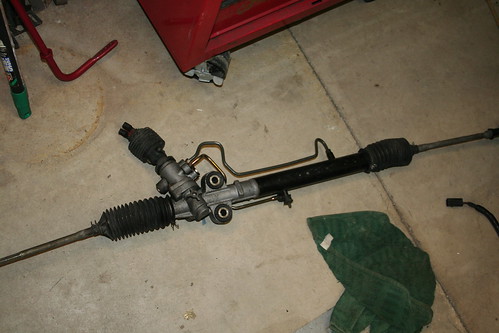
IMG_5703 by duncanrellis, on Flickr
Will post some pictures of the subframes after paint. That should be the last of the painting. Thank goodness. If I ever get a little more geographically stable (currently active duty military) my shop will have room for a permanent paint booth so I don't have to spend hours of my life putting up and taking down plastic and setting up fans.
Duncan
#17
Posted 11-26-2012 05:57 PM
-
- Moderators
-
- 6,121 posts
Veteran Member
- Location:Fremont, CA
- Region:San Francisco
- Car Year:1999
- Car Number:88
#18
Posted 11-27-2012 12:00 AM
-
- Members
-
- 441 posts
Member
- Location:Reno, NV
- Region:SFR
- Car Year:1991
- Car Number:42

#19
Posted 11-27-2012 05:12 PM
-
- Members
-
- 251 posts
Member
Can't decide on the color of the subframes. Torn between gray and black. Any thoughts? The black's a little easier to paint but I thought the gray might be an interesting contrast. I have both paints on hand.
Here's some pictures.
Shiny diff.
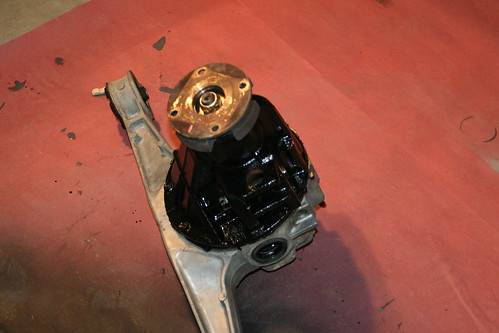
IMG_5707 by duncanrellis, on Flickr
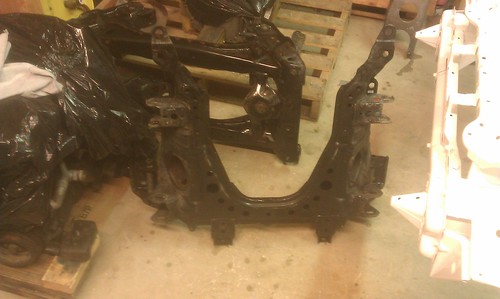
Primed front subframe. Need to do a little bit of sanding to cut a few runs and then it's ready for paint.
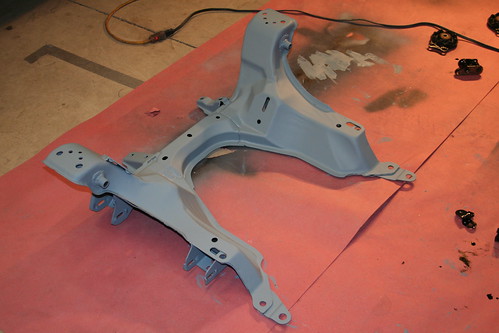
IMG_5706 by duncanrellis, on Flickr
Primed rear subframe. This thing was no fun to paint. Not recommended.
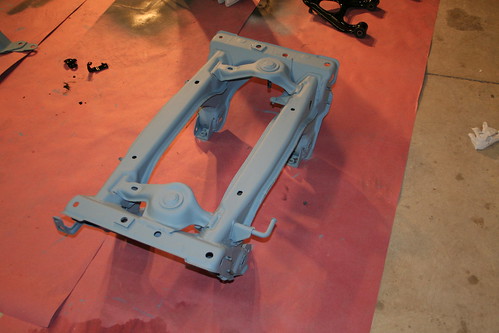
IMG_5705 by duncanrellis, on Flickr
Shiny control arms. Sorry for the terrible light. It's cold outside and I have the heater on so the paint drys properly. Lots of shadows from the overhead lights and halogen spotlights I'm using to work.
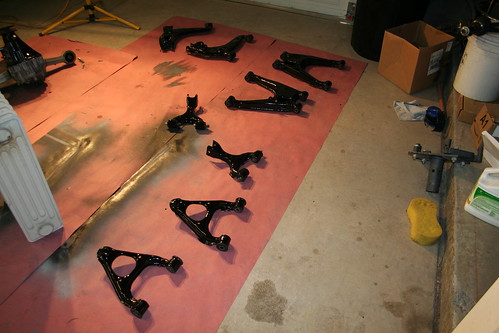
IMG_5704 by duncanrellis, on Flickr
More updates later.
Duncan
#20
Posted 11-27-2012 05:13 PM
-
- Members
-
- 251 posts
Member
Duncan you do realize that rain is forecast for Sonoma Feb 9th and 10th right?? (just sayin)
If I don't work on this I have to confront finishing my thesis.

Duncan

0 user(s) are reading this topic
0 members, 0 guests, 0 anonymous users

