Subframe brace for your NA/NB Spec Miata in SCCA & NASA
#21

 Posted 05-02-2017 07:56 AM

- Jim Drago likes this
V2 Motorsports
#22

 Posted 05-02-2017 08:59 AM

One of the big issues the SMAC had was the worry that the stock location of the lower control arm pivot point would be modified when welding and adding brackets. That's why many proposals were not approved including Daves. The final design keeps as much of the OEM weld intact and visible for inspection as well as a spec part with the mazda logo and lazer cut hoes in the logo (Sean's great idea) to check compliance. The SMAC insisted that every measure be taken to avoid the temptation of noncompliance. All members of the SMAC worked very hard contributing to a robust, techable, cost effective design.
I have to commend you guys on that one.. very nice piece for far less than I could make myself and all bases were covered!
- Ron Alan, Sean - MiataCage, High Chair and 1 other like this
East Street Auto Parts
Jim@Eaststreet.com
800 700 9080


#24

 Posted 06-19-2017 04:33 PM

Dredging up an old thread.
At Road America we had at least 3 subframes break, that I know of. If you have not put these on, please do so for your own good.
On the one subframe that I saw with my eyes, the upper control arm mount was ready to pull out of the subframe, as well as the lower mount which already had broken. Read the older posts and you will see that I recommended a 4 piece kit be allowed. But nobody else had seen the upper mount break. Well ,know many have. I hope the SMAC will look into allowing an upper brace also.
dave
Dave Wheeler
Advanced Autosports, the nations most complete Spec Miata shop
Author, Spec Miata Constructors Guide, version 1 and 2.0
Building Championship winning cars since 1995
4 time Central Division Spec Miata Champion car builder 2012-2013-2014-2017
Back to Back June Sprints Spec Miata 1-2 finishes 2016 and 2017
5 time June Sprints winner in Mazda's
6 Time Northern Conference Champion Car Builder
2014 SCCA Majors National point Champion car builder
2014 SCCA Runoffs winner, T4 (Bender)
2014 Central Division Champion, ITS (Wheeler)
2013 Thunderhill 25 hour winning crew chief
2007 June Sprints winner, (GT1, Mohrhauser)
Over 200 race wins and counting.
www.advanced-autosports.com
dave@advanced-autosports.com
608-313-1230


#25

 Posted 06-22-2017 09:31 AM

The plates are very well made and fit great. I added mine while I am building a new car so it made it a lot easier to remove the subframe. Wire wheel on an air grinder made paint removal in the small corners easy. I will be installing them with the subframe in place for another car so I hope my upside down welding skills are up to snuff.
Attached Files


#26

 Posted 06-22-2017 10:04 AM

The plates are very well made and fit great. I added mine while I am building a new car so it made it a lot easier to remove the subframe. Wire wheel on an air grinder made paint removal in the small corners easy. I will be installing them with the subframe in place for another car so I hope my upside down welding skills are up to snuff.
I am going to do mine with my mig welder and push the puddle rather than pull it, i think it will be fine.
Frank
TnT Racing
SCCA Ohio Valley Region


#27

 Posted 06-22-2017 10:56 AM

Cooper Lilly did 2 sets of them at the Sprints. one on the car one off. looked and worked great!
- lillyweld likes this


#28

 Posted 06-22-2017 01:03 PM

I am going to do mine with my mig welder and push the puddle rather than pull it, i think it will be fine.
What percentage of lawyers can weld?
You're in an elite group, Frank.
- FTodaro likes this


#29

 Posted 06-22-2017 03:36 PM


#30

 Posted 06-23-2017 08:56 AM

I am going to do mine with my mig welder and push the puddle rather than pull it, i think it will be fine.
If doing it on the car, you will need to up the amperage quite a bit and use a good anti-spatter to keep the filler material from jumping off the puddle.
- FTodaro likes this


#31

 Posted 06-29-2017 01:09 PM

any problems with the heat affecting the LCA bushings if you are welding it on the car?
- Speed


#32

 Posted 06-29-2017 08:58 PM

The meat of the weld is on the inboard side but it wouldn't be a bad idea to remove the cam bolts and let the LCA inboard side hang loose during welding. You will want to paint them as well to prevent rust.


#33

 Posted 07-03-2017 07:59 PM

With all due respect, you’re over thinking this. These things are exceptionally well designed so they not only fit perfectly, but the edges are cut to create a perfect grooves to maximize penetration even with a process as cold as short-circuit MIG. In my experience, positioning the piece so that the Mazda logo faces towards the center of the car lets the piece sit down father in the void and it leaves ample room to weld around all the four edges. Push or pull, it doesn’t matter; do it the way you would always do it. (I like to drag for better penetration and to avoid cold lap.) If you clean all faying surfaces well (which you should always do with a non-flux process like MIG), you will have not spatter, but a shot of anti-spatter is good insurance. Also, you can’t set the amperage with a constant voltage process like MIG (except through the wire speed which doesn’t help because the machine increases the amperage to melt the wire so the “heat†never makes it to the puddle . . . it’s a long story . . .), so set your voltage and your wire speed for the metal thickness (12 gauge), and have at it. Due to the design and cut of the pieces, they weld in very easily.
With the corner of the front tray simply folded out of the way, the only thing the heat from the weld caused was a good deal of smoke as it burned off the oil caught in the void of the sub-frame. I have never seen an actual flame while doing this, only a lot of smoke. (I switch to the other side of the car when this happens to let the side I just welded cool down.) Weld each of the brace’s four edges alternately (versus, for example, welding all around the bracket) to avoid the risk of warping (i.e. top edge, bottom edge, left side and then right side). I haven’t seen the slightest indication of any effect on chassis settings and structure other than the smoke.
Finally, thumbs up on the paint suggestion. Metal is never so vulnerable to oxidation and corrosion than after it has been melted and hardened. Personally, I think it is good practice to seal all metal after it has been welded.
In summary, they made these things idiot proof, and this idiot has tested them. Just brush-clean everything really well before you start, and then go for it.
- mellen likes this
Cooper Lilly
#69 Spec Miata
Henderson, Kentucky
#34

 Posted 07-06-2017 11:01 AM

Dredging up an old thread.
At Road America we had at least 3 subframes break, that I know of. If you have not put these on, please do so for your own good.
On the one subframe that I saw with my eyes, the upper control arm mount was ready to pull out of the subframe, as well as the lower mount which already had broken. Read the older posts and you will see that I recommended a 4 piece kit be allowed. But nobody else had seen the upper mount break. Well ,know many have. I hope the SMAC will look into allowing an upper brace also.
dave
I think you may be referring to my subframe. I attached pictures if others are interested. Now I have the braces attached for the lower control arms.
Attached Files
#35

 Posted 10-12-2017 07:21 PM

Is 0000-04-5989 the right part number? I can't seem to find that on Mazda's site.
#36

 Posted 10-12-2017 08:35 PM

I think you may be referring to my subframe. I attached pictures if others are interested. Now I have the braces attached for the lower control arms.
Mine broke in the same spot when I was there for the CAT nationals 6-7 years ago during the test day. Took it to a circle track guy nearby (Dave may know who that is) and had them weld it up with a plate.
Have since replaced subframe but would've been good to have this piece instead.


#37

 Posted 10-13-2017 11:18 AM

Is 0000-04-5989 the right part number? I can't seem to find that on Mazda's site.
I couldn't "find" them either when I went looking for them last week (remember my SM/NJ Miata's panic post?).
Had to call MSP directly to get them ordered and forgot to ask how to find them in the future.
P.S. Mine was an NA1.8 and after 8 years of me racing it (uncertain how many from previous owners), the LF finally cracked.

#38

 Posted 10-13-2017 06:45 PM

Brandon, you're right. That is the right part number and for some reason it doesn't show up in search. However you can put "0000-04-5989" into the quick order field and it works. Weird.
-j
- TylerQuance likes this
#39

 Posted 10-14-2017 09:48 AM

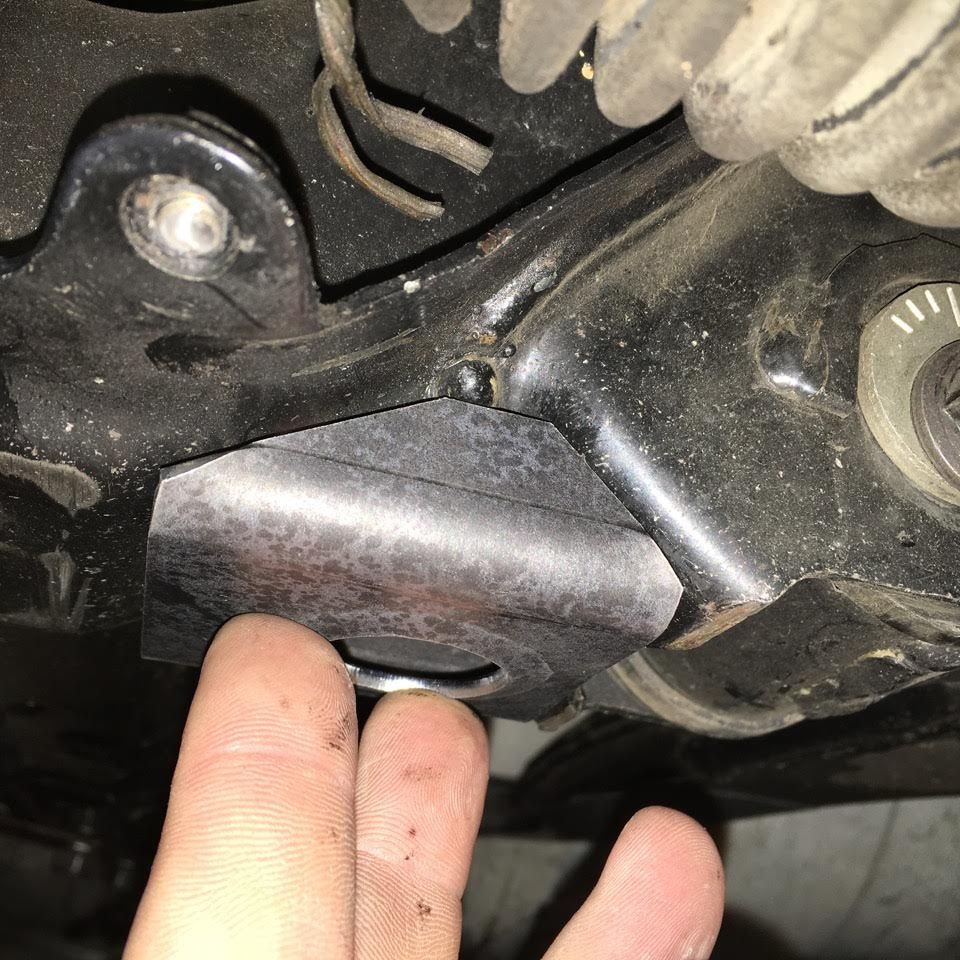
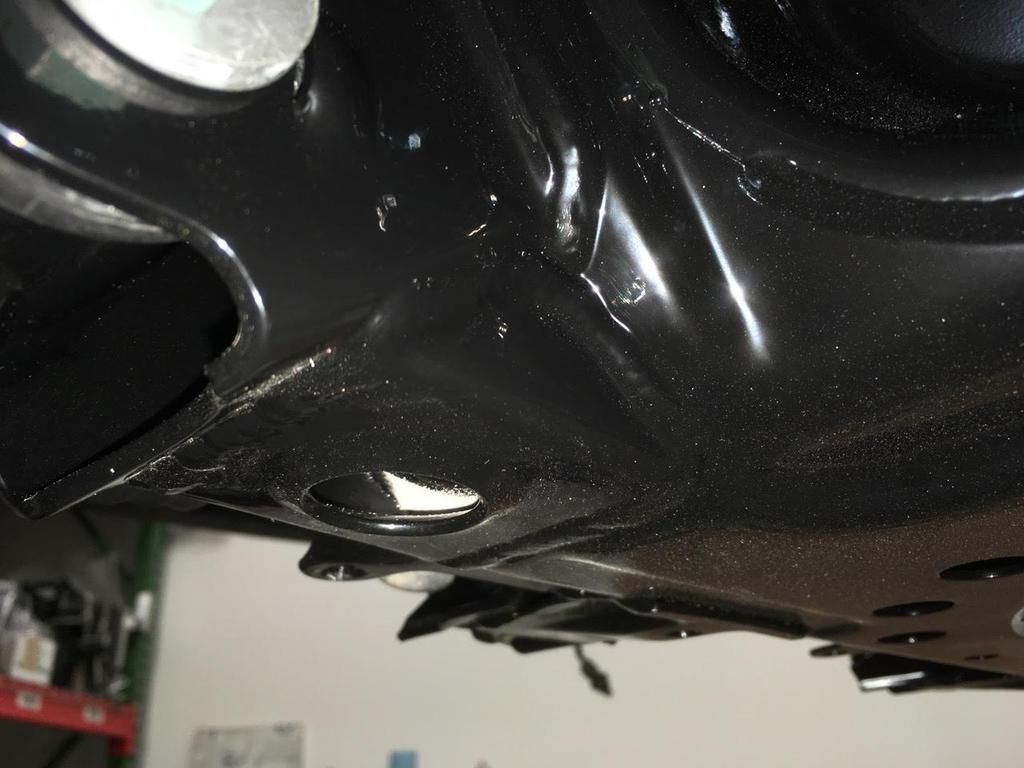
Here are a few pictures that may help with where they go on the car. These images are from the first couple prototypes that were made, so they don't have the Mazda logo and tech inspection holes.
A special thank you to Ralph Provitz who donated his time to design the bracket and put it into a CAD file so that prototypes could be made for review. Once they were test fit and approved Ralph was kind enough to donate the drawings to Mazda so they could own and control the manufacturing process to bring them to the racer as cheap as possible.
[/URL]
[url=[/URL">http://s307.photobuc...1t8fk.jpg.html]
Russians just stole your fingerprint, hacked your phone, and drained your 401k.
- Tom Sager likes this
For faster reply than PM: miataboxes>>>AT<<<gmail>>DOT<<<com
#40

 Posted 10-14-2017 10:59 AM

0 user(s) are reading this topic
0 members, 0 guests, 0 anonymous users


 Sign In
 Create Account


 Back to top
 Report

