


 Sign In
 Create Account


#41

 Posted 11-26-2011 04:11 AM
Austin Robison
-
- Members
-

- 103 posts
Member
- Location:Palo Alto, CA
- Region:SFR
- Car Year:1991
- Car Number:47
So for next steps, I guess it's clean everything (while waiting for the cage), decide whether I want to do rings, and find myself a machinist in the area who can get the compressions ratio set and to bring the valves to spec, reseat them, and perhaps do the plunge cut. Are people usually decking the block or milling the head to bring the compression ratio up? Doesn't look like there's a whole lot of room on either side. Then clean clean clean, get some new seals and o-rings and the like, and reassemble. I foresee a large part order to Mazdaspeed
 Back to top
 Report
#42
Posted 11-26-2011 03:40 PM
Todd Tagget
-

- Members
-
- 441 posts
Member
- Location:Reno, NV
- Region:SFR
- Car Year:1991
- Car Number:42
Damn Austin, it's like you're documenting everything I need to do. I'm picking my car up Thursday in SLC.. I'll be down in the Bay Area the following week to buy you a beer or three.

#43
Posted 11-26-2011 03:53 PM
Austin Robison
-
- Members
-
- 103 posts
Member
- Location:Palo Alto, CA
- Region:SFR
- Car Year:1991
- Car Number:47
Damn Austin, it's like you're documenting everything I need to do. I'm picking my car up Thursday in SLC.. I'll be down in the Bay Area the following week to buy you a beer or three.
For sure! The engineer in me wants to optimize all of engine bits I can tinker with...gotta keep in mind that I also need to finish the thing so I can actually go practice driving it!
#44
Posted 11-27-2011 02:05 AM
Austin Robison
-
- Members
-
- 103 posts
Member
- Location:Palo Alto, CA
- Region:SFR
- Car Year:1991
- Car Number:47
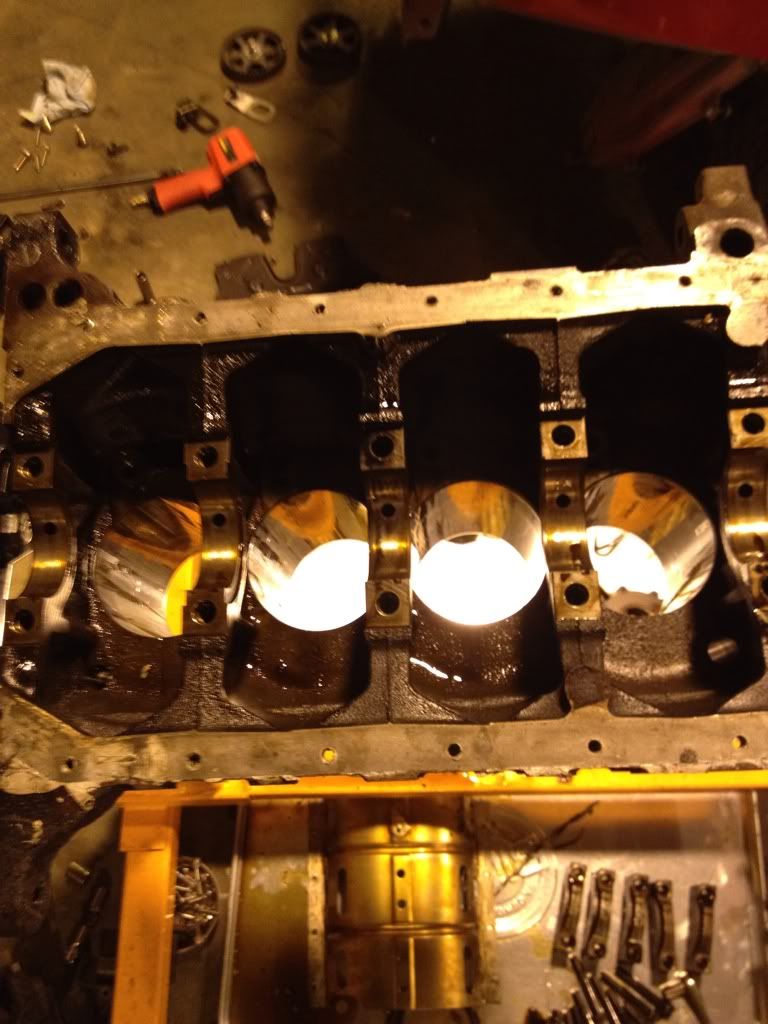
I took another look at the rings this afternoon, you could drive a boat through the end gaps. Also, it looks like the cylinder has been slightly bored, or at least honed before, the diameters are all right around 3.072". Cuttin' it pretty close. No wonder the leak down test didn't go so well
#45
Posted 11-28-2011 02:45 AM
Austin Robison
-
- Members
-
- 103 posts
Member
- Location:Palo Alto, CA
- Region:SFR
- Car Year:1991
- Car Number:47
Took a few more bits off the block today:
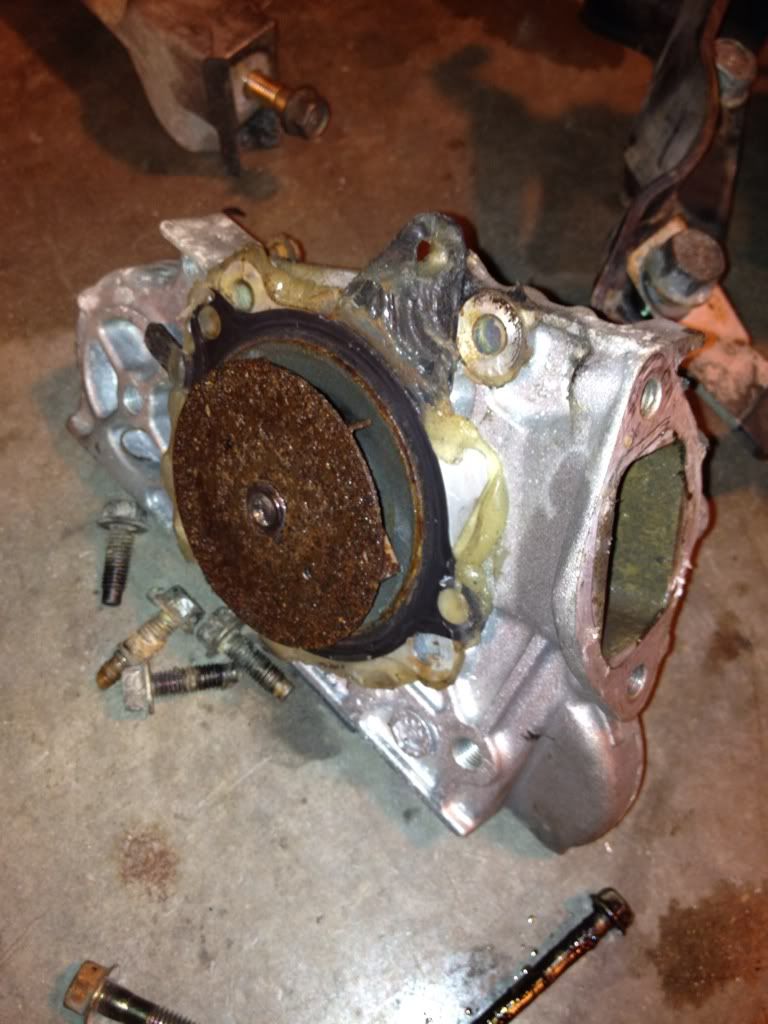
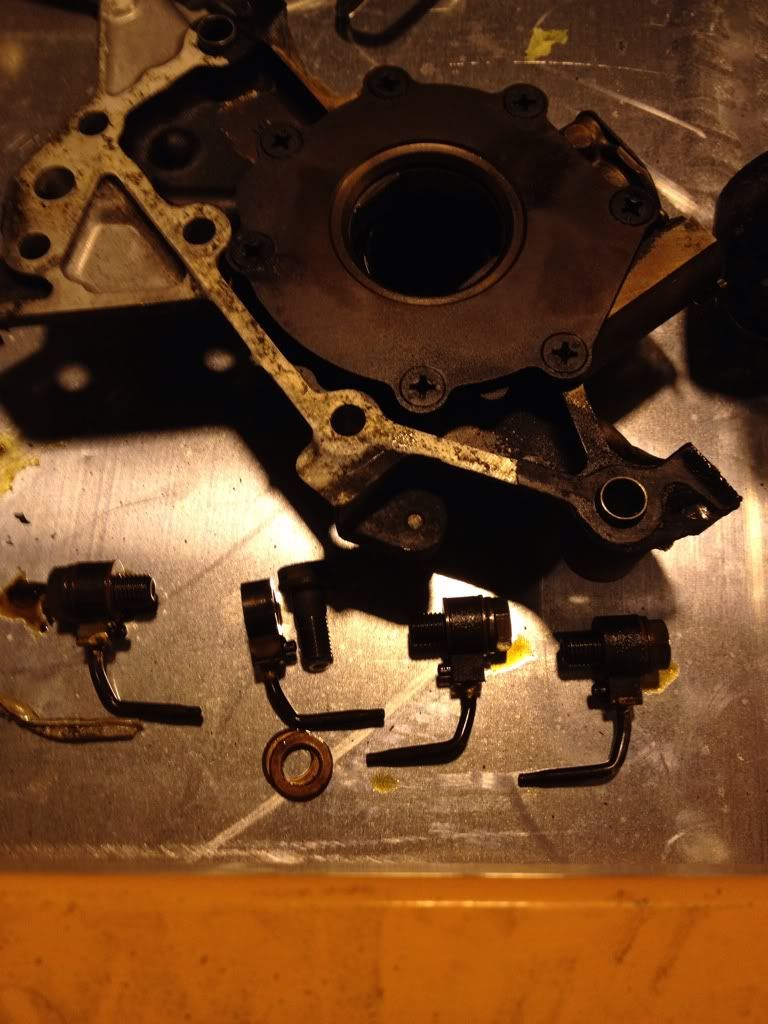
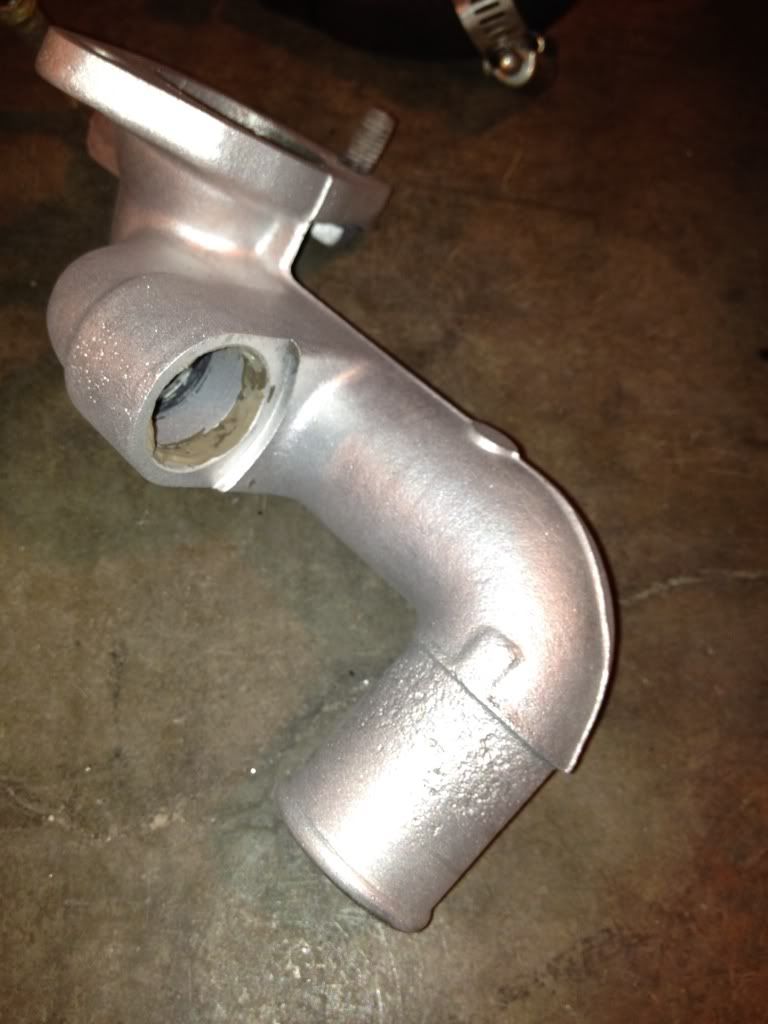
A rusty looking water pump...
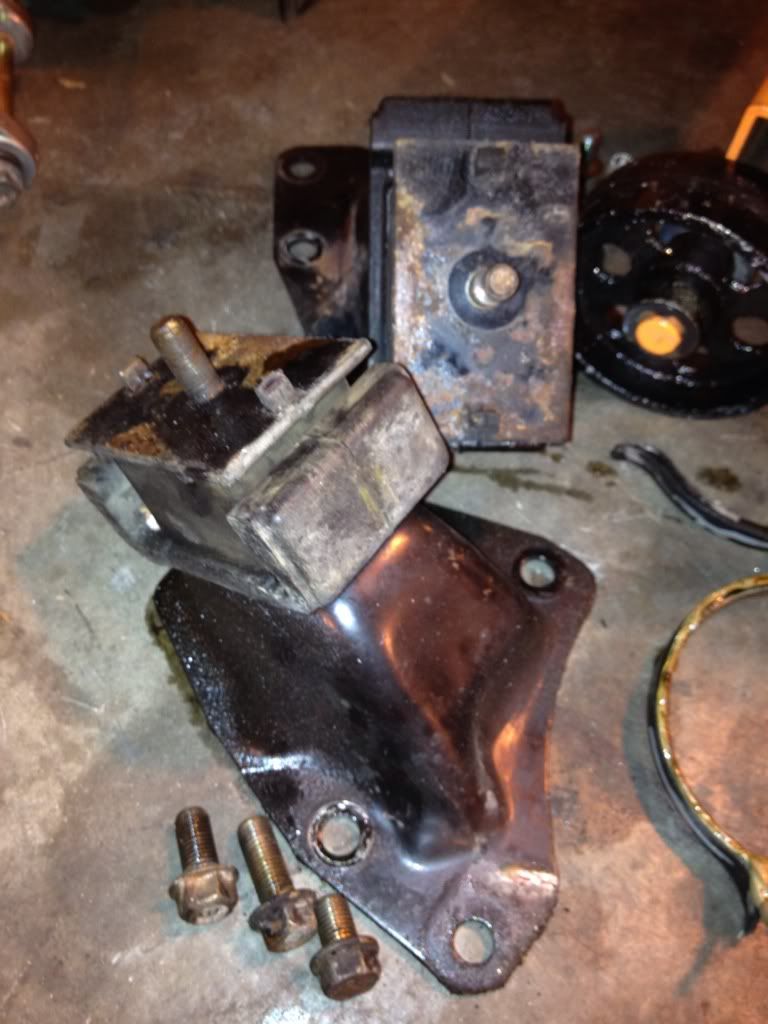
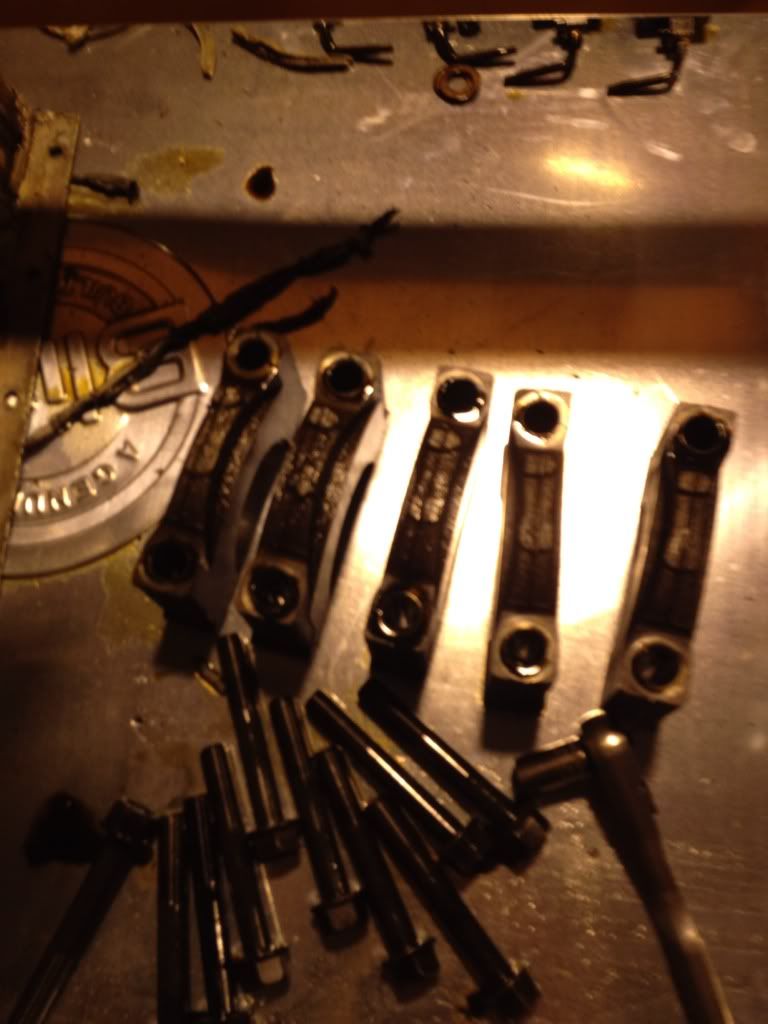
The engine mounts with three different sized bolts...
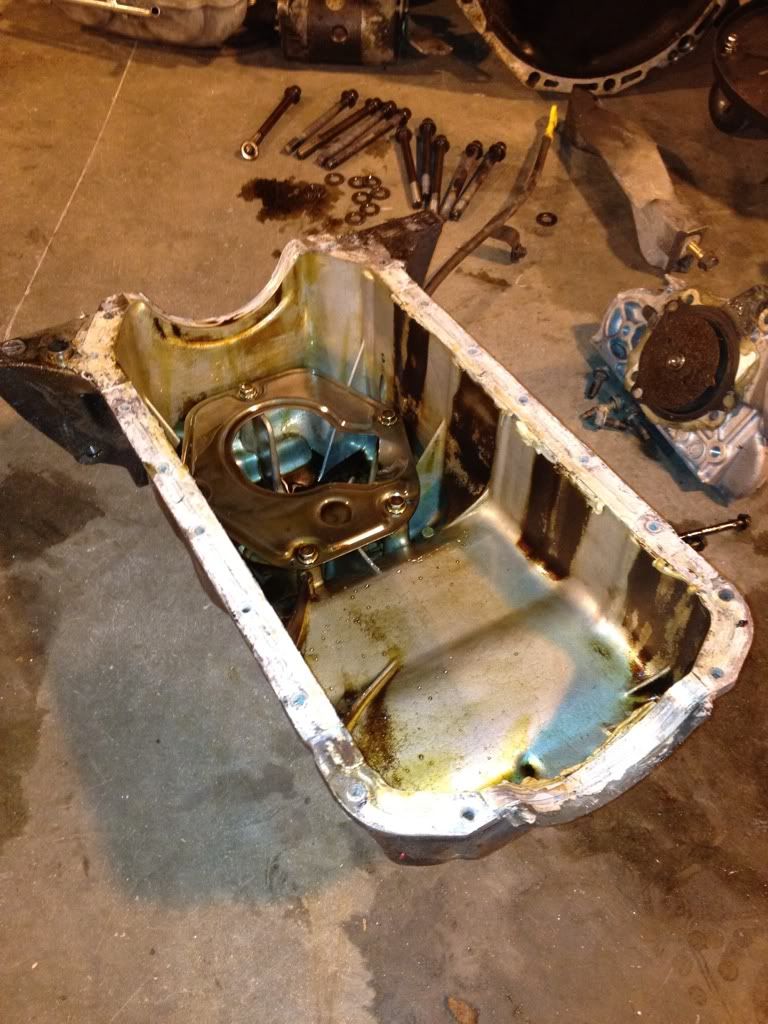
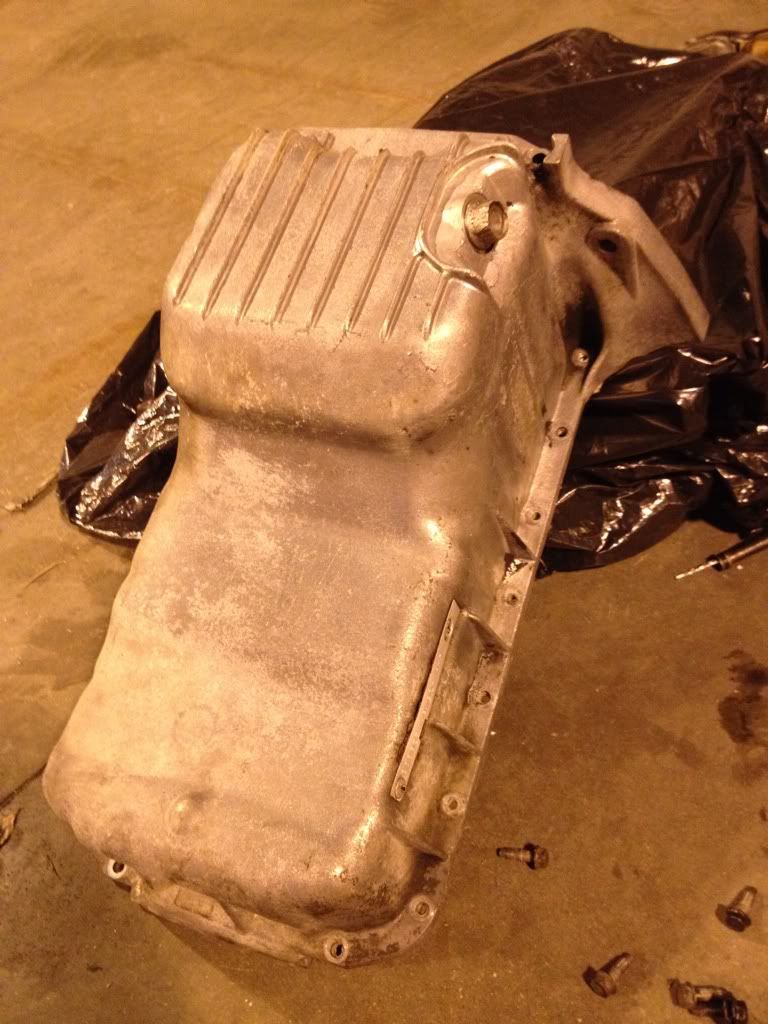
And an oil pan with fifty pounds of sealant all over it. Isn't there supposed to be a gasket there?!
A rusty looking water pump...
The engine mounts with three different sized bolts...
And an oil pan with fifty pounds of sealant all over it. Isn't there supposed to be a gasket there?!
#46
Posted 11-28-2011 02:47 AM
Austin Robison
-
- Members
-
- 103 posts
Member
- Location:Palo Alto, CA
- Region:SFR
- Car Year:1991
- Car Number:47
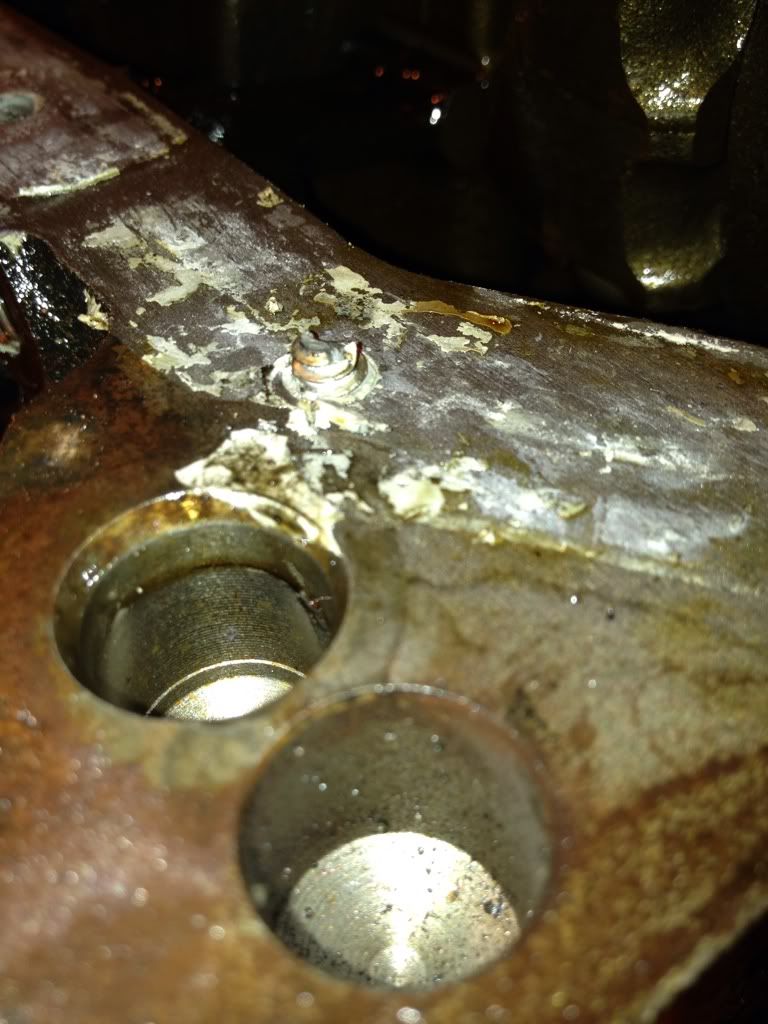
Also make sure that you get all the bolts off the oil pan before attempting to pry it loose, thinking that all of that sealant has just really gotten it stuck...
At least the head of the bolt popped off cleanly and I'll just have to drill that bad boy out. Who hides a bolt behind a giant cooling fin anyway?
At least the head of the bolt popped off cleanly and I'll just have to drill that bad boy out. Who hides a bolt behind a giant cooling fin anyway?
#47
Posted 11-28-2011 02:48 AM
Austin Robison
-
- Members
-
- 103 posts
Member
- Location:Palo Alto, CA
- Region:SFR
- Car Year:1991
- Car Number:47
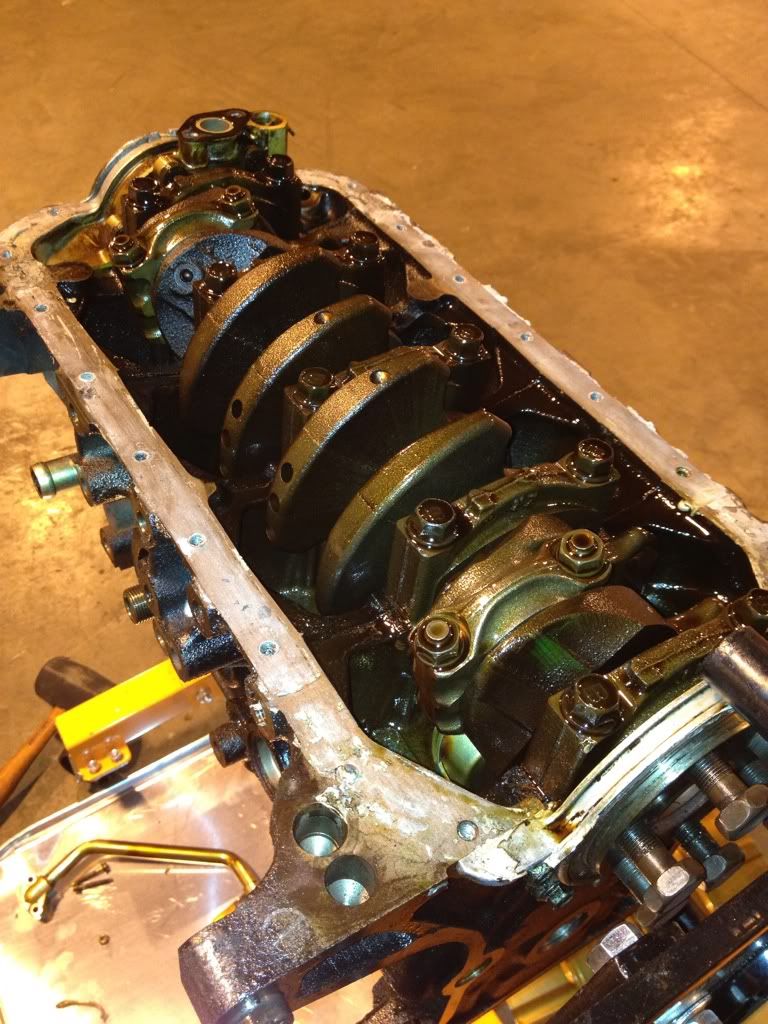
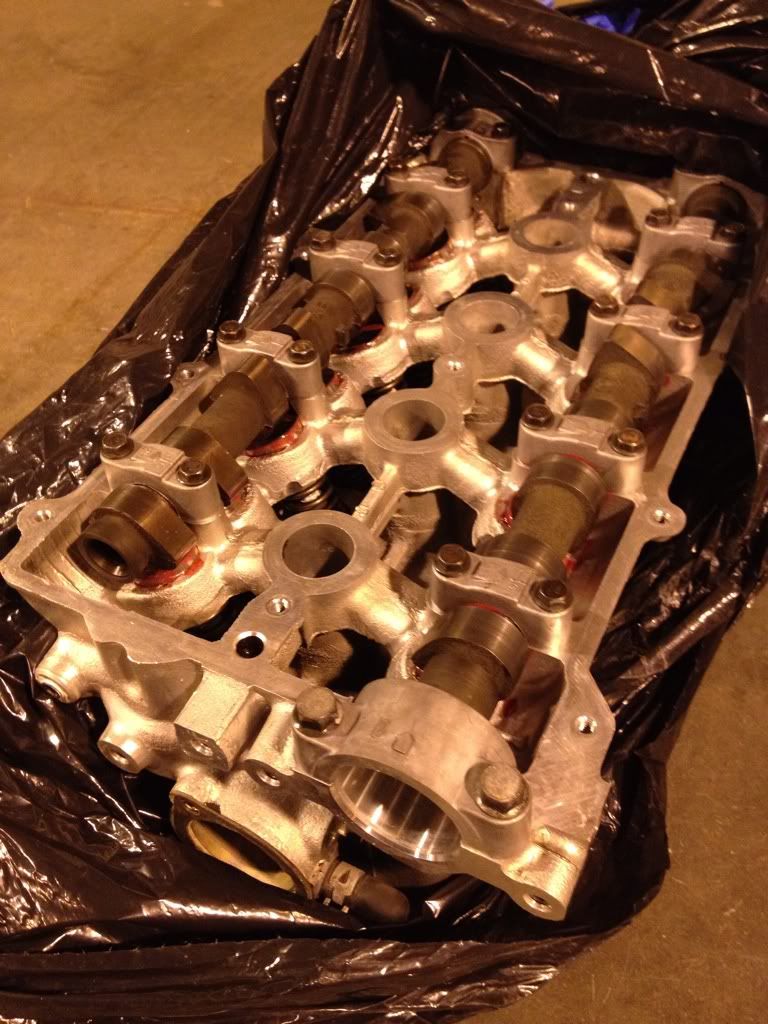
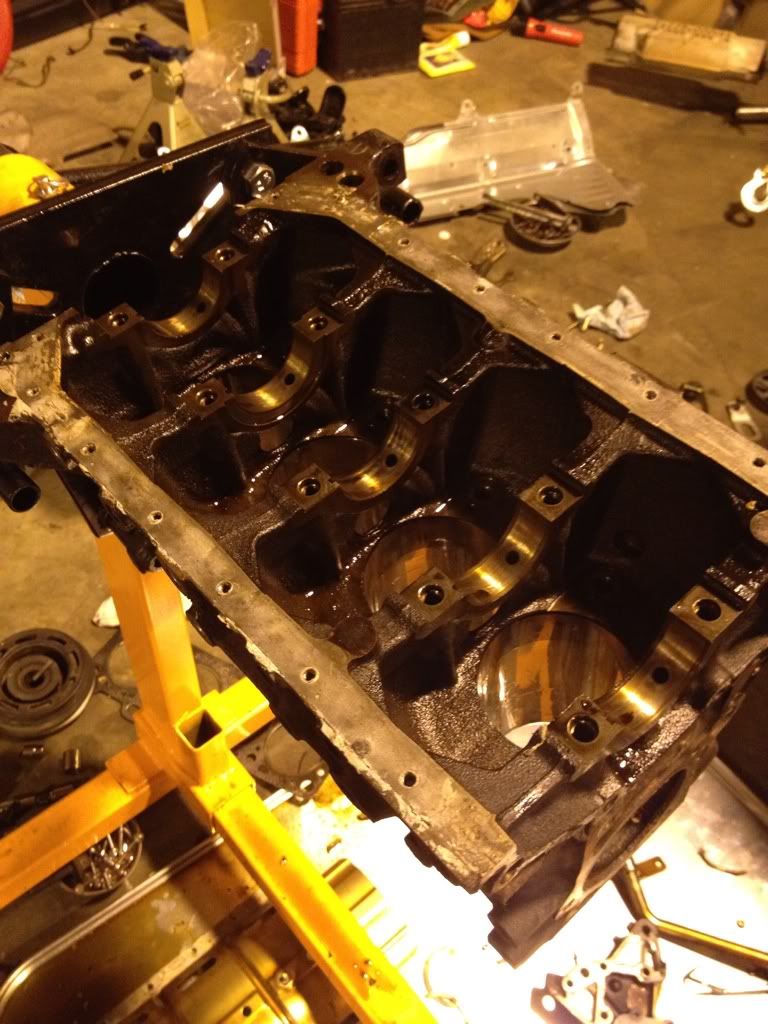
And all of the spinny bits are now revealed (after prying the windage tray out of the fifty billion pounds of sealant as well)
#48
Posted 11-30-2011 11:36 PM
Austin Robison
-
- Members
-
- 103 posts
Member
- Location:Palo Alto, CA
- Region:SFR
- Car Year:1991
- Car Number:47
#49
Posted 12-01-2011 02:21 AM
Charlie Hayes
-

- Members
-
- 513 posts
Veteran Member
- Location:Walnut Creek, Ca
- Region:West Coast
- Car Year:1999
- Car Number:22
Hey, cool step by step build. Are you planning on having it done for the 2012 season?
The engine mounts actually do have different sized bolts. You will notice that one of the holes in the block has a shoulder on it which will take the longer of the three. The side with the starter, if you use the bracket will also use a longer one.
About the oil pan Mazda uses grey sealant, so what you see is normal.


#50
Posted 12-01-2011 01:19 PM
Austin Robison
-
- Members
-
- 103 posts
Member
- Location:Palo Alto, CA
- Region:SFR
- Car Year:1991
- Car Number:47
Hey, cool step by step build. Are you planning on having it done for the 2012 season?
The engine mounts actually do have different sized bolts. You will notice that one of the holes in the block has a shoulder on it which will take the longer of the three. The side with the starter, if you use the bracket will also use a longer one.
About the oil pan Mazda uses grey sealant, so what you see is normal.
I'm hoping to have it at least trackable by the middle of January for a track day and completed for the SCCA season opener, yeah.
Makes sense with the engine mount bolts; and does Mazda usually go completely overboard with the sealant? I was pulling 1/4" diameter blobs of the stuff off the inside of the crankcase.
#51
Posted 12-12-2011 10:38 PM
Austin Robison
-
- Members
-
- 103 posts
Member
- Location:Palo Alto, CA
- Region:SFR
- Car Year:1991
- Car Number:47
Finally found some more time to wrench on the Miata after getting distracted driving a big awesome pile of yellow rusty crap around Buttonwillow with the LeMons crew and doing some actual work too
The engine teardown is complete; need to do some measurements before I order new bearings and rings and see if the cylinders need honing or not. I also got a great looking head from Mike Haag:

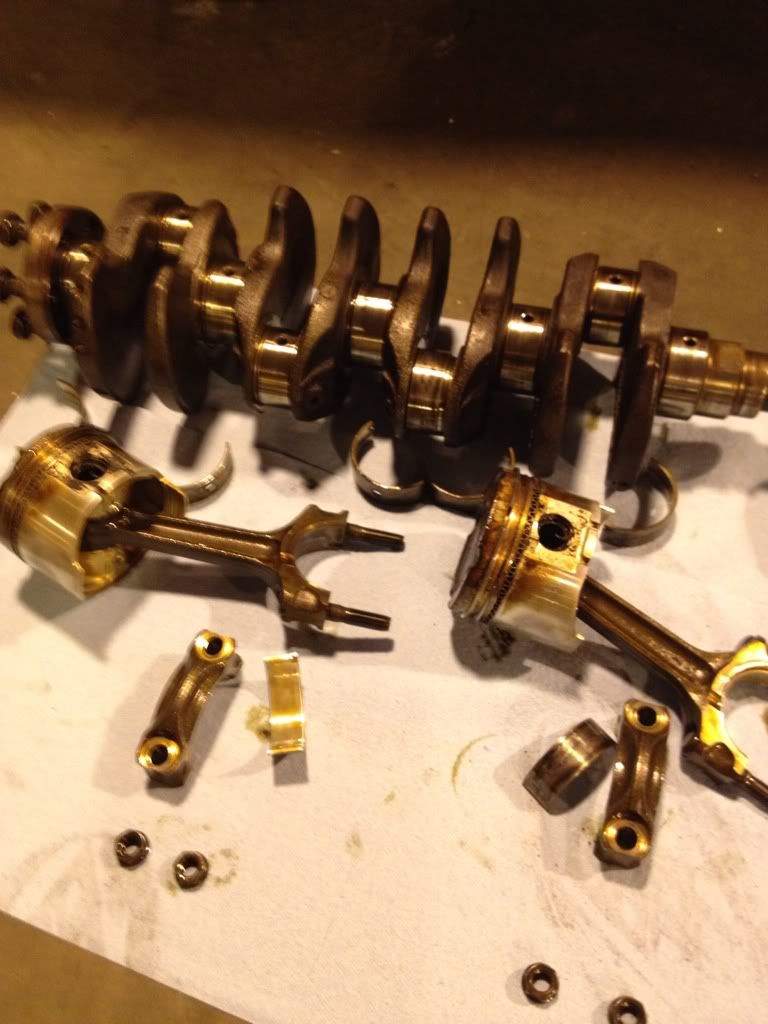
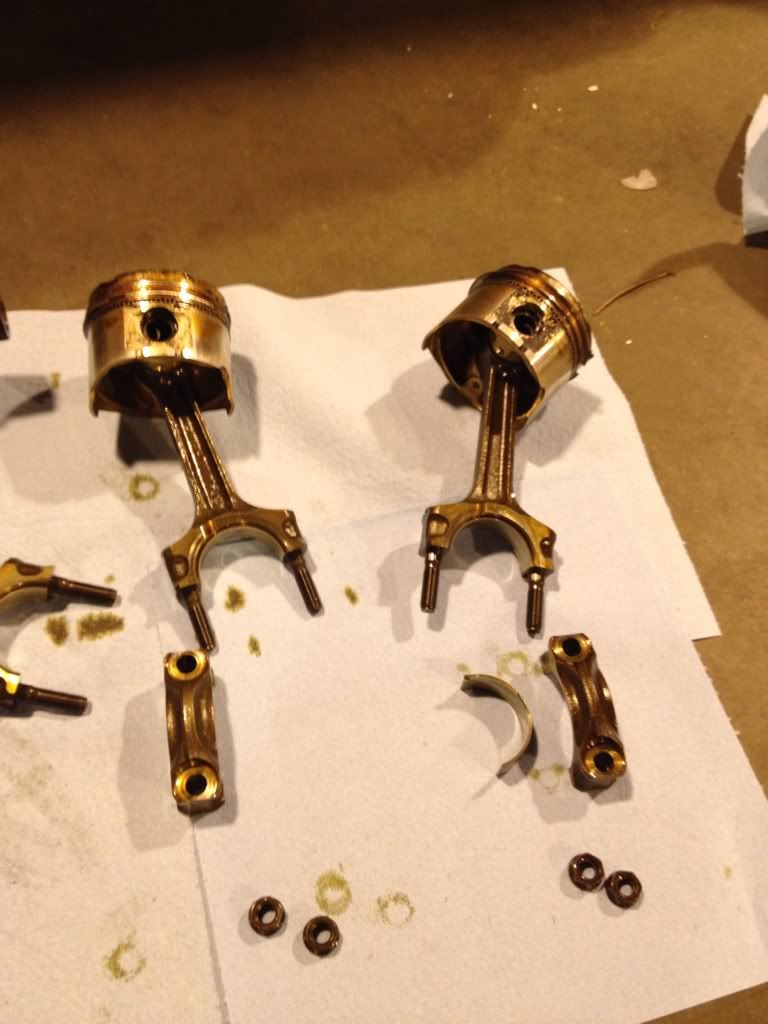
The engine teardown is complete; need to do some measurements before I order new bearings and rings and see if the cylinders need honing or not. I also got a great looking head from Mike Haag:
#52
Posted 12-12-2011 10:40 PM
Austin Robison
-
- Members
-
- 103 posts
Member
- Location:Palo Alto, CA
- Region:SFR
- Car Year:1991
- Car Number:47
#53
Posted 12-12-2011 10:53 PM
Austin Robison
-
- Members
-
- 103 posts
Member
- Location:Palo Alto, CA
- Region:SFR
- Car Year:1991
- Car Number:47
I also got my suspension parts from Advanced Autosports today, so time to get started on the mechanicals as well. Suspension looks straight forward to install. What's the story on brake calipers? Replace with rebuilt calipers on high mileage cars like this one?
Remaining items:
Put engine back together
Install clutch and reattach transmission
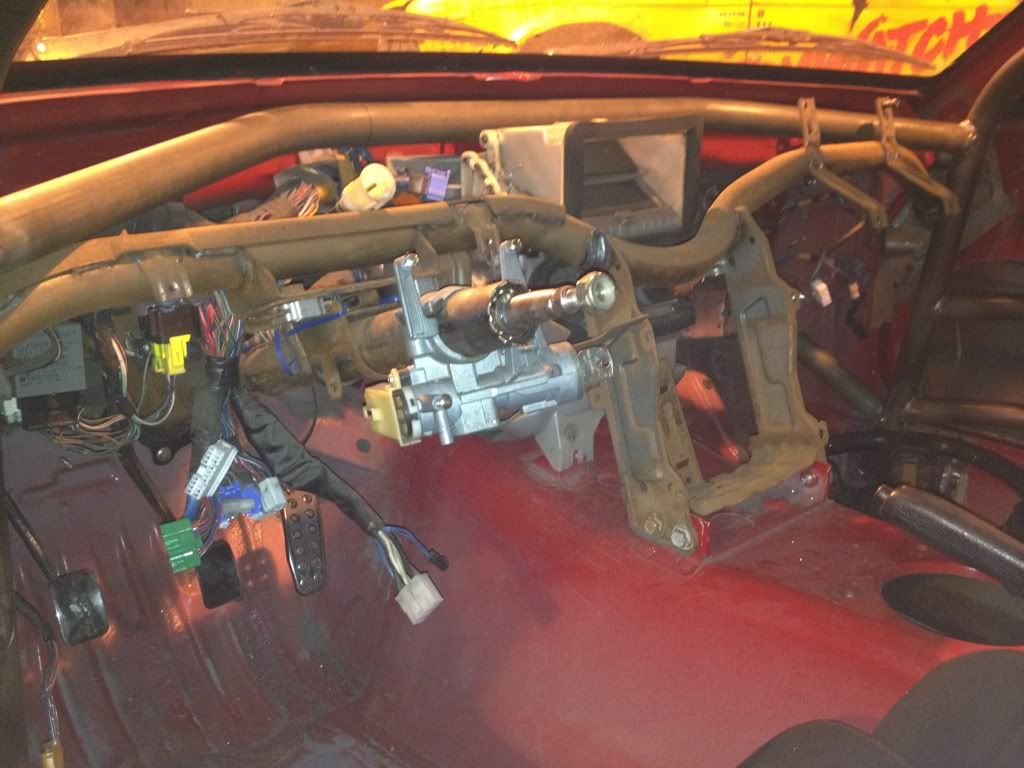
Paint interior and reassemble dash
Suspension & brakes
Find a diff and reassemble drivetrain
Reassemble exterior fascia and paint thing
Everything else I've forgotten...
Remaining items:
Put engine back together
Install clutch and reattach transmission
Paint interior and reassemble dash
Suspension & brakes
Find a diff and reassemble drivetrain
Reassemble exterior fascia and paint thing
Everything else I've forgotten...
#54
Posted 12-12-2011 10:58 PM
Austin Robison
-
- Members
-
- 103 posts
Member
- Location:Palo Alto, CA
- Region:SFR
- Car Year:1991
- Car Number:47
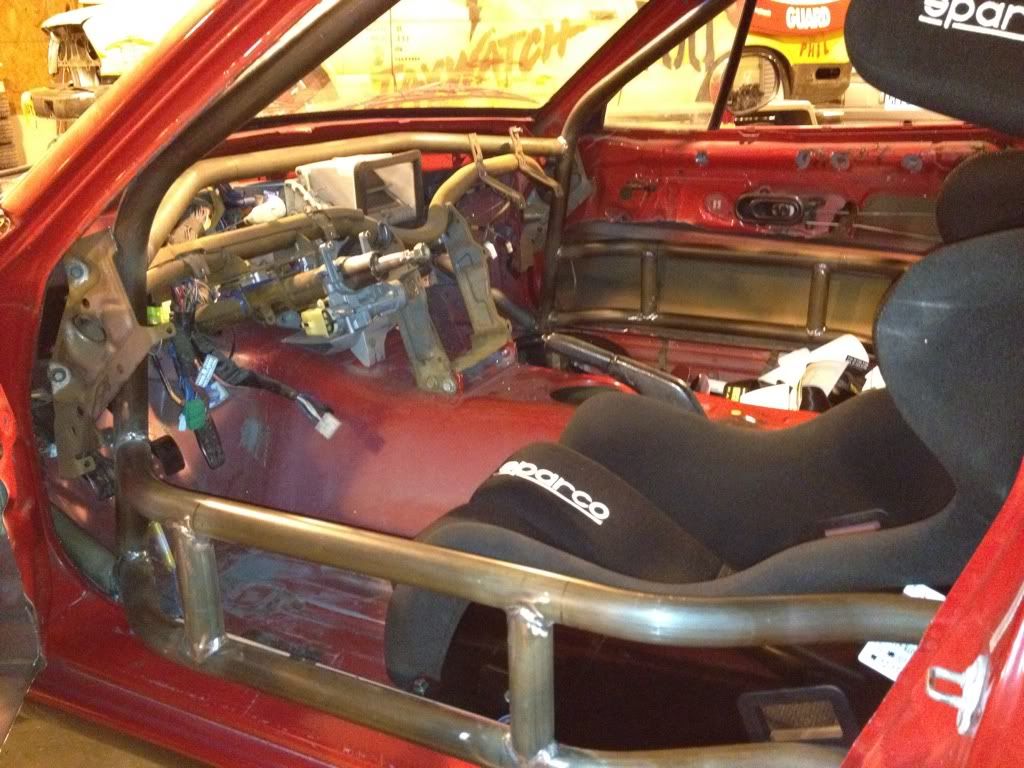
I also test fit myself in my seat with helmet on and discovered I'm about a inch short on headroom (not to mention being a little too close to the roll cage bar for comfort). The bottom of the seat is already just about on the floorpan, so I suppose I can move it forward a bit and tilt it back more...stupid tallness. Any suggestions?
#55
Posted 12-13-2011 01:54 AM
Ron Alan
-

- Members
-
- 3,732 posts
Veteran Member
- Location:Northern CA
- Car Year:1995
Take out pad...not much but something. Is the seat right on the mount that TC made? If not drill new holes below? My guess is he will modify what he did to get the seat lower if you ask!
Ron
RAmotorsports

#56
Posted 12-13-2011 02:10 AM
Austin Robison
-
- Members
-
- 103 posts
Member
- Location:Palo Alto, CA
- Region:SFR
- Car Year:1991
- Car Number:47
Take out pad...not much but something. Is the seat right on the mount that TC made? If not drill new holes below? My guess is he will modify what he did to get the seat lower if you ask!
Yeah, I emailed Tony to see what he thinks we can do. Haven't tried taking the pads out yet, but when I felt how much padding there was under my sit bones it didn't feel like there was going to be enough padding to get me low enough.
#57
Posted 12-13-2011 03:29 PM
Alberto
-

- Members
-
- 1,471 posts
Veteran Member
- Location:Mountain View, CA
- Region:SFR
- Car Year:1990
Keep in mind that the padding on the Sparco Pro ADV will mold itself to your body over time. After a few weekends of use, I needed the bring the seat forward 1" so that I could still reach the wheel and pedals. I was going to bring it to Tony for re-adjustment but his brother said to just drill new holes in the bracket 1" further forward and try that before going to the trouble and expense of bringing it in for them to do. Unibit and drill resolved the issue. 
Don't forget the SFI 45.1 padding for the areas of the roll bar closest to the driver's head - http://www.saferacer...l?productid=613
TC carries these as does Wine Country.
Don't forget the SFI 45.1 padding for the areas of the roll bar closest to the driver's head - http://www.saferacer...l?productid=613
TC carries these as does Wine Country.
#58
Posted 12-13-2011 08:47 PM
dstevens
-
- SMembers
-
- 1,404 posts
Veteran Member
- Location:Vegas
- Region:LVR
Replace with rebuilt calipers on high mileage cars like this one?
Buy new/rebuilt from a known source. I use NAPA. Don't matter how fast you go if you can't stop....
#59
Posted 12-13-2011 08:52 PM
dstevens
-
- SMembers
-
- 1,404 posts
Veteran Member
- Location:Vegas
- Region:LVR
Here is what I used. Permatex Ultra Gray.About the oil pan Mazda uses grey sealant, so what you see is normal.
http://www.permatex....sket_Maker.html
I try get it in a 13 oz cartridge when I can though most of the chain auto places only stock the tube. A tube will easily do a Miata pan.
#60
Posted 12-13-2011 11:48 PM
Tom Hampton
-

- SMembers
-
- 2,060 posts
Egregious Member
- Location:Mckinney, tx
- Region:South west
- Car Year:1992
- Car Number:41
I highly recommend replacing the master cylinder, and the front calipers. Poor maintenance (over the years) in either can result in brake drag. I'd also check the rears very carefully. Minus the core charge they don't cost much---Its about a $20-$30 differential 'round these parts.
There's a lot of peace of mind to be had with a new hydraulic system.
There's a lot of peace of mind to be had with a new hydraulic system.
-tch
Build: www.tomhampton.info
video: vimeo.com/tomhampton
Support: X-Factor Racing
I didn't lose, I just got outspent!


Also tagged with one or more of these keywords: build, na, scca, construction, 1991, 1.6L

|
Spec Miata →
Spec Miata Safety →
Cage fab shop in Southern CaliforniaStarted by luvin_the_rings , 09-14-2017 |
|
|
|
|
|
Spec Miata →
Spec Miata Garage →
Need help with 1.6L IdleStarted by ZeroX12 , 04-21-2017 |
|
|
|
|
|
Spec Miata →
Spec Miata (SM) →
Majors at Watkins GlenStarted by ack154 , 04-28-2016 |
|
|
|
|
|
Spec Miata →
Spec Miata Garage →
Questions on ECU Part numbersStarted by luvin_the_rings , 10-28-2015 |
|
|
|
|
|
Spec Miata →
Spec Miata (SM) →
Another newbie thread (Where do I get started)Started by AFlockhart1865 , 05-13-2015 |
|
|
1 user(s) are reading this topic
0 members, 1 guests, 0 anonymous users

