Jump to content

Photo

First time removing tranny...what else to switch out?


  • Please log in to reply
138 replies to this topic

#61
stillentwint17

stillentwint17

    Member

  • Members
  • PipPipPip
  • 61 posts

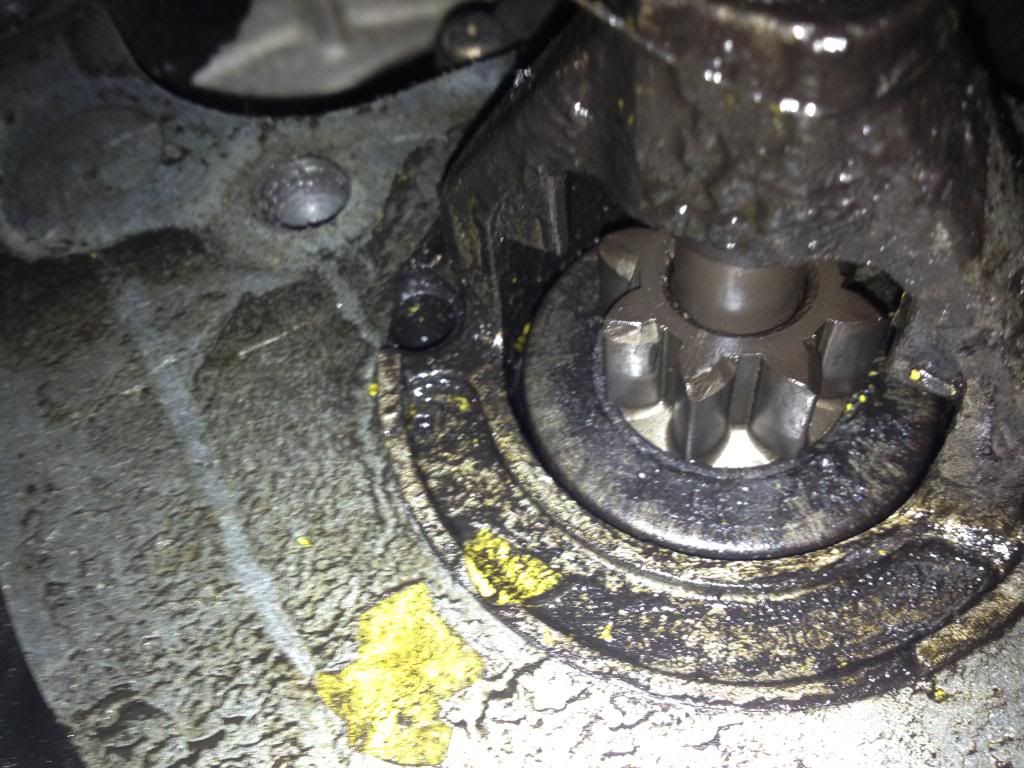
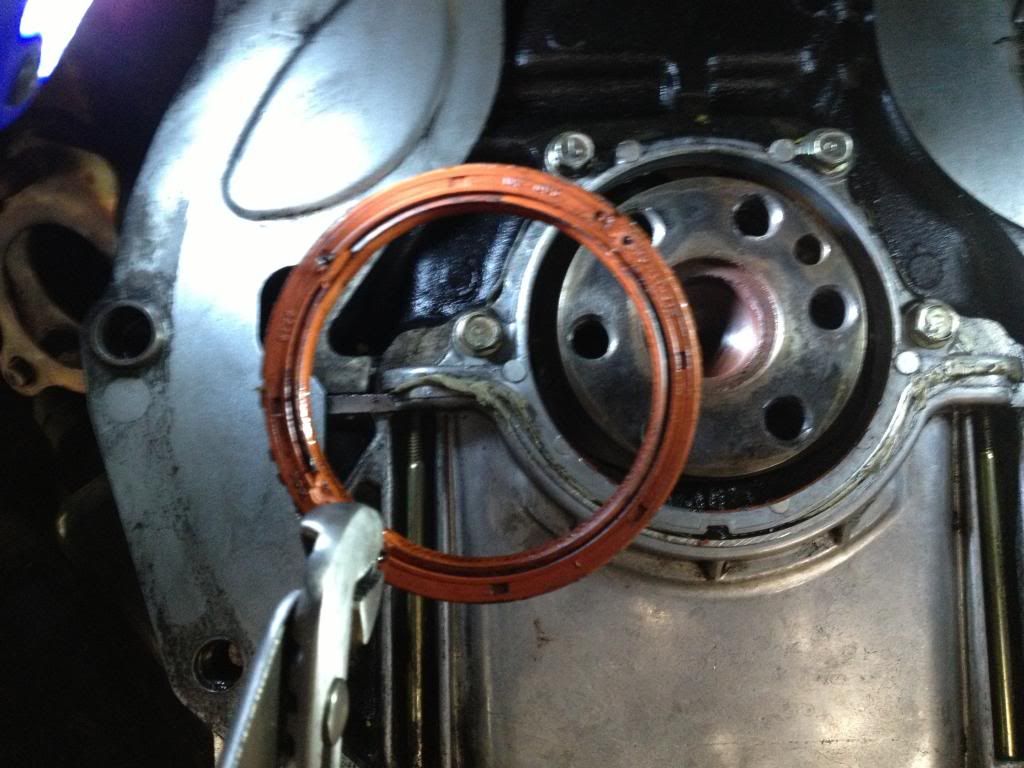
Can't answer that question long distance. A couple things to check before you clean anything. Is the valve cover leaking and draining down the rear of the head and block?  Is the there any leaking from the cam angle sensor?  The CAS is on the passenges rear side of the head at the rear end of the cam. Me not being there I would replace the crank oil seal and the o-ring for the CAS.


For a comfort level, do you have a knowledgeable car guy friend. An experience someone to look over your shoulder laways makes for a feel good.

Hi Frank,


Thanks for the heads up. No, unfortunately i dont have anyone near by that can look over my shoulder. These last few days have been quite an exploratory process. I'm been navigated by the input provided by you guys (which i really cant thank everyone enough for).


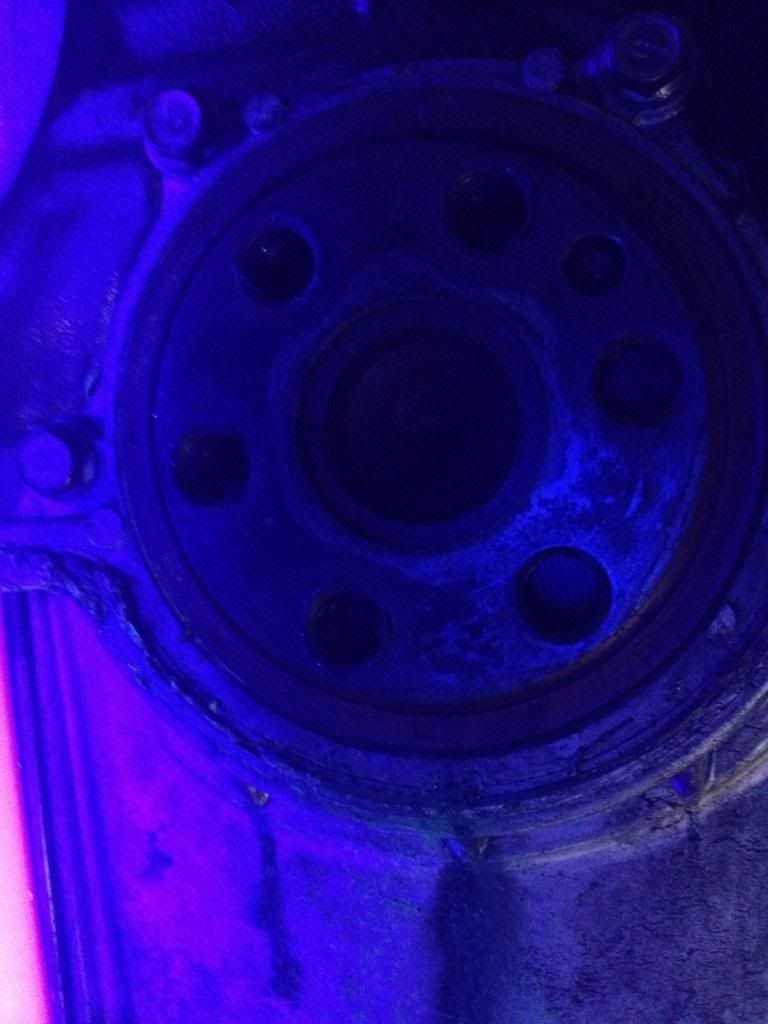
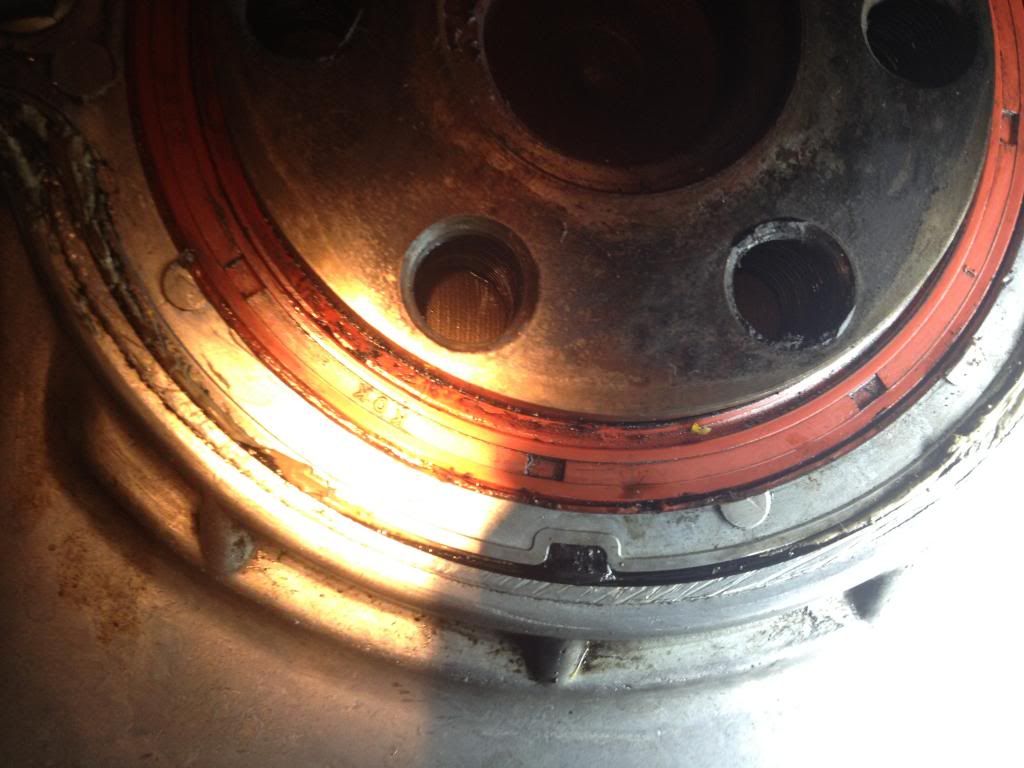
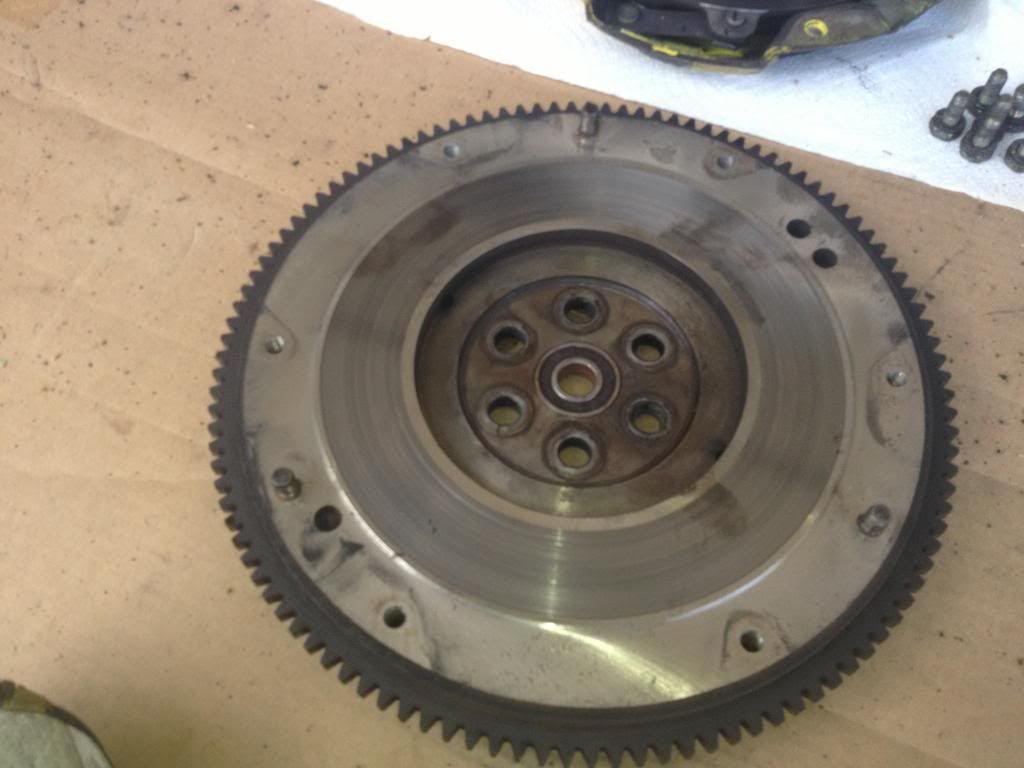
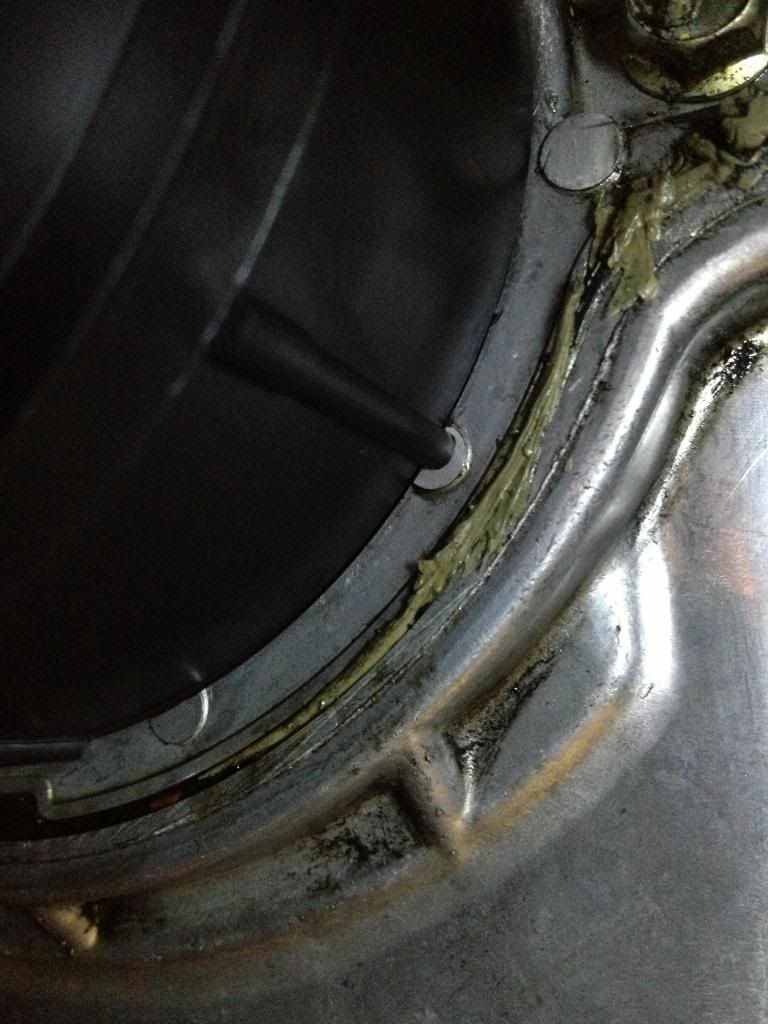
I did a fluroescence test a few months ago. Some of the residue definetly stayed with the oil pan gasket. This could be because the gasket material soaked up the dye or it could just be that the oil pan gasket is what needs to be replaced. I did also see reminants of the dye within the flywheel holes and exactly at the 7:00 mark that you guys pointed out.


I did not see any dye near the CAS but i also havent really looked. I was a dumbass and cleaned the CAS and everything after taking pictures under the black light. I'll post the black light photos in a few minutes.


#62
stillentwint17

stillentwint17

    Member

  • Members
  • PipPipPip
  • 61 posts

Here is a photo with the black light. Dunno if this helps.

IMG_2809_zpsb7551546.jpg


Also, the CAS...i dont have a clue what to do with that. I'll look at the manual shortly

hIMG_2808_zpsbdb9acf8.jpg


#63
Keith Novak

Keith Novak

    Steadily Improving Member

  • SMembers
  • PipPipPipPipPip
  • 1,128 posts
  • Location:Seattle
  • Region:Northwest/Oregon
  • Car Year:1995
  • Car Number:88

The flourecent photo justs reminds me of 80s album covers.  As for the CAS, there's an o-ring in there where it fits into the head that can leak.  One of the tricks to solving oil leaks is not replacing the stuff down low where you see the evidence of the leak when it's the stuff up above causing the leak in a place you can't see.  I've spent a lot of time R&Ring things that weren't leaking because they had oil on them before finding the offending leaker several feet away from the drip.   Do you have an inspection/dental mirror to look at the back of the head to see if the leak is originating from higher than the trans?


  • stillentwint17 likes this
Donor - Made PayPal donation Bona fide - A bonafide Spec Miata driver We have a Winnah! - Won their 1st race... Congratulations!

#64
stillentwint17

stillentwint17

    Member

  • Members
  • PipPipPip
  • 61 posts

Thanks Keith. I do have a few dental picks and mirrors. Thats definetly good advice. I was a dumbass and just assumed it was the seal so i cleaned everything. There was yellow paint (from the clutch) everywhere!


I'm down at the rear main seal and I'm trying to get it out but its a huge PAI. Am i blatently missing something. I read the http://www.miata.net...utch/index.html guide on how to remove it but it really doesnt say anything. Does anyone know of a tool i can use. I looked up taped screwdriver and oil seal removal tool but theres nothing out there really.


Has anyone had good results taping the seal and pulling it out with screws? I tried to pry it out with one of those eye-glass sets of flathead screws drivers but I'm worried cuz i dont want to damage the contact surface.


Has anyone had any good results from something i can go out and purchase tomorrow?


Thanks!

IMG_2814_zpsf11b6c0d.jpg


#65
Keith Novak

Keith Novak

    Steadily Improving Member

  • SMembers
  • PipPipPipPipPip
  • 1,128 posts
  • Location:Seattle
  • Region:Northwest/Oregon
  • Car Year:1995
  • Car Number:88

It's a serious PITA any way you try to do it.  When I've done it with the engine in, I basically gouged enough out the middle with an x-acto knife to sitck something in the gap that could provide enough leverage to pull it out.  the outside surface is aluminum so you don't want to muck that up too badly.  The inside surface is steel so it's harder to muck up but that's also the rotating side.


You can't see the inside of what you're looking at so FYI, the mating surface of the crankshaft is smooth with no ridges or anything, as is that aluminum ring that holds the seal.  What I would personally do is use a drill on low speed to carefully cut a hole or series of holes STRAIGHT through the rubber and stick a hook like this in it to pry it out.

http://www.harborfre...ller-35556.html


I'd place something under the bearing surface of the puller across the crank and the retaining ring to help pull it out withoug damanging anything.


Donor - Made PayPal donation Bona fide - A bonafide Spec Miata driver We have a Winnah! - Won their 1st race... Congratulations!

#66
Ron Alan

Ron Alan

    Veteran Member

  • Members
  • PipPipPipPipPip
  • 3,732 posts
  • Location:Northern CA
  • Car Year:1995

You posted a picture of the starter gear...did you mean to do this thinking it was the CAS?  If you have figured out where the CAS is on your motor(1.6 on the passenger back of the head, 1.8 on the driver), Like Keith said use a light and a mirror and look under the CAS...I almost guarantee its leaking a little...as well as the valve cover gasket in the same area! If you remove the CAS to change the o-ring mark its location...you will see a little mark somewhere around the slotted hole. This is your current timing on the car! Also as you pull it out SLOWLY note the location of internal gear...this makes it a lot easier to reinstall if you visually see its position. Also note the little gear looks different on the 2 sides...it can only go in one way...not rotated 180 degress


Ron

RAmotorsports


Donor - Made PayPal donation Bona fide - A bonafide Spec Miata driver

#67
fotostars

fotostars

    Member

  • Members
  • PipPipPip
  • 312 posts
  • Location:Norcal
  • Car Year:1997
  • Car Number:63

Sorry, catching-up on this thread.

Here is how I learned how to do this from someone who does RMS in his sleep ;-)


Drill a small hole with a drill bit, enough for a good screw to catch on it (remember that the seal is basically a rubber coated metal plate)...


Then use pliers to pull it off..


On a different topic, feeling the surface, it's really smooth. Why would I want to resurface the FW?


  • stillentwint17 likes this
Survive the 25, NASA Thunderhill - Survive the 25, NASA Thunderhill Bona fide - A bonafide Spec Miata driver

#68
stillentwint17

stillentwint17

    Member

  • Members
  • PipPipPip
  • 61 posts

It's a serious PITA any way you try to do it.  When I've done it with the engine in, I basically gouged enough out the middle with an x-acto knife to sitck something in the gap that could provide enough leverage to pull it out.  the outside surface is aluminum so you don't want to muck that up too badly.  The inside surface is steel so it's harder to muck up but that's also the rotating side.


You can't see the inside of what you're looking at so FYI, the mating surface of the crankshaft is smooth with no ridges or anything, as is that aluminum ring that holds the seal.  What I would personally do is use a drill on low speed to carefully cut a hole or series of holes STRAIGHT through the rubber and stick a hook like this in it to pry it out.

http://www.harborfre...ller-35556.html


I'd place something under the bearing surface of the puller across the crank and the retaining ring to help pull it out withoug damanging anything.

Thanks a million Keith. I went to Harbour Frieght and Sears this morning and pretty much purchased every tool that I thought could possibly work. I was able to find the tool you sent me so thank you very much for that!


I will try pilot and tap the seal with a 6-32 and pull the seal out. If that doesnt work, i'll use the holes to pull the seal off with some hook type tools i purchased this morning.


I really hope to get this seal out today. Thanks for the heads up on the material difference of the shaft and housing. I'll do my best to stay against the steel side.


Man, you guys must of done this a hundred times!


#69
stillentwint17

stillentwint17

    Member

  • Members
  • PipPipPip
  • 61 posts

Sorry, catching-up on this thread.

Here is how I learned how to do this from someone who does RMS in his sleep ;-)


Drill a small hole with a drill bit, enough for a good screw to catch on it (remember that the seal is basically a rubber coated metal plate)...


Then use pliers to pull it off..


2prtsli.jpg


f3f7yp.jpg


On a different topic, feeling the surface, it's really smooth. Why would I want to resurface the FW?


hupx1e.jpg

Hi Richard,


Thank you very much for the photos. This helps a great deal. I'm going to attempt to remove the seal as you have shown in a few minutes. I hate how in the manual or process instructions it says " Step 10_ remove the fly wheel. Step 11_ Remove the Oil Seal Step 12_ etc..... I hate how it skips the whole day or work required to remove that seal. Well, I'll keep you guys posted.


How are you going to determine if you flywheel is ok Richard?


#70
stillentwint17

stillentwint17

    Member

  • Members
  • PipPipPip
  • 61 posts

Is the contact surface of my flywheel too thin....Its almost flush with the housing...


IMG_2798_zps7b3213c2.jpg


#71
stillentwint17

stillentwint17

    Member

  • Members
  • PipPipPip
  • 61 posts

The hole I make with the drill in the seal can be a thru hole right?? It doesnt have to be blind...


#72
Keith Novak

Keith Novak

    Steadily Improving Member

  • SMembers
  • PipPipPipPipPip
  • 1,128 posts
  • Location:Seattle
  • Region:Northwest/Oregon
  • Car Year:1995
  • Car Number:88

Correct.  That' was my intent when pointing out that there are no ribs or anything on either the retaining ring or the crankshaft.


  • stillentwint17 likes this
Donor - Made PayPal donation Bona fide - A bonafide Spec Miata driver We have a Winnah! - Won their 1st race... Congratulations!

#73
Mark McCallister

Mark McCallister

    Member

  • Members
  • PipPipPip
  • 164 posts
  • Location:Gainesville, FL
  • Region:Central Florida
  • Car Year:1991
  • Car Number:40

Inspecting a clutch disk is like inpecting brake pads, they have rivits holding the materail on to the disk, they do not have much material to start with so when the material is just about even with the rivit its time to ptich it. The only exception to what i just said is that if your running an act 4 puck disk, they are made of super hard material and new the have less than a 1/32 of materal and they last forever. It helps to see one new then you get the idea.


Thanks Frank.  Mine is the ACT "lasts forever" type.  I was just feeling like I should check it for wear while I had the motor and trans out since it had been in there 5 years, but I guess as long as it isn't doing anything untoward, all is well.


Bona fide - A bonafide Spec Miata driver

#74
Keith Novak

Keith Novak

    Steadily Improving Member

  • SMembers
  • PipPipPipPipPip
  • 1,128 posts
  • Location:Seattle
  • Region:Northwest/Oregon
  • Car Year:1995
  • Car Number:88

Thanks Frank.  Mine is the ACT "lasts forever" type.  I was just feeling like I should check it for wear while I had the motor and trans out since it had been in there 5 years, but I guess as long as it isn't doing anything untoward, all is well.

A couple years ago I was installing things at the last minute and had a minor freak out post when I thought I needed a new one w/o time to order it.  That was a couple years ago.  It hasn't really changed since then.


  • stillentwint17 likes this
Donor - Made PayPal donation Bona fide - A bonafide Spec Miata driver We have a Winnah! - Won their 1st race... Congratulations!

#75
stillentwint17

stillentwint17

    Member

  • Members
  • PipPipPip
  • 61 posts

And 4 hrs later....

IMG_2823_zps954e5026.jpg


#76
stillentwint17

stillentwint17

    Member

  • Members
  • PipPipPip
  • 61 posts

Correct.  That' was my intent when pointing out that there are no ribs or anything on either the retaining ring or the crankshaft.

Thanks Keith. Much appreciated!


I was reading a few other forum instructions and it said to just drill a hole deep enough to thread...I didnt know if they meant a blind hole so just to double check I wanted to ask. Thanks!


I had to drive to home depot and get a drill. Then get some hardware and etc etc etc.. Finally it came out.


  • Keith Novak likes this

#77
FTodaro

FTodaro

    Veteran Member

  • SMembers
  • PipPipPipPipPip
  • 3,084 posts
  • Location:Columbus Ohio
  • Region:Great Lakes
  • Car Year:2001
  • Car Number:35

I have a 2000 street miata sitting  on my lift ready to put the transmission off to do exactly what you are doing. It has been leaking and I am not sure if its the pan or the rear main. I rebuilt it last year but had to tear it down after I put it together as i has some issues with the rings and pistions. so i am not sure if my issue is the rear main or those two rubber gaskets on each end of the oil pan.


I am hoping that when I pull off the trans its appearent where its leaking. I am hoping its the rear main, much faster to  do that then to pull the pan. But I will be ready to drill and tap that sucker.


  • stillentwint17 likes this

Frank
TnT Racing
SCCA Ohio Valley Region
 

Make it Rain - Made Paypal donation of $100+ We have a Winnah! - Won their 1st race... Congratulations! Bona fide - A bonafide Spec Miata driver Donor - Made PayPal donation

#78
stillentwint17

stillentwint17

    Member

  • Members
  • PipPipPip
  • 61 posts

Thats awesome Frank. Its a fun project. I'm sure you'll enjoy it more than me. I'm sure its more fun when its not the first time you've done it.  I'm new to all this so its quite the challenge. I just purchased this old spec car in Nov and this is the first time ive ever worked on cars so its hard but a great learning experience. Theres nothing like a track day in 5 days that forces you to work your ass off and get the car running.


I hope its not your oil pan thats leaking...The idea of having to take an engine scares the bejesus out of me but I'm sure its no big deal to you.


If you have to change out your rear main seal, you should buy this 3" pipe from Home Depot. I spent most of the day at various car stores looking for a tool to press in the RMS. I decided to just go to home depot and purchase some tubing. This is a 3" ABS pipe that has notches on it that will bottom on the tabs on the engine.


IMG_2827_zpsdde20259.jpg


IMG_2830_zps5477cced.jpg


Best of luck with the car!


#79
stillentwint17

stillentwint17

    Member

  • Members
  • PipPipPip
  • 61 posts

You posted a picture of the starter gear...did you mean to do this thinking it was the CAS?  If you have figured out where the CAS is on your motor(1.6 on the passenger back of the head, 1.8 on the driver), Like Keith said use a light and a mirror and look under the CAS...I almost guarantee its leaking a little...as well as the valve cover gasket in the same area! If you remove the CAS to change the o-ring mark its location...you will see a little mark somewhere around the slotted hole. This is your current timing on the car! Also as you pull it out SLOWLY note the location of internal gear...this makes it a lot easier to reinstall if you visually see its position. Also note the little gear looks different on the 2 sides...it can only go in one way...not rotated 180 degress


Hi Ron,


Yah, you were right. I was looking at the starter gear and thought that was the CAS. There does look to be a bit of oil from the CAS/block. Is this something i can attach after i put the clutch in or do you recommend holding off on the clutch and working on the CAS..


I just finished putting the RMS in so I'm trying to determine my next step.


Thanks Ron


#80
Keith Novak

Keith Novak

    Steadily Improving Member

  • SMembers
  • PipPipPipPipPip
  • 1,128 posts
  • Location:Seattle
  • Region:Northwest/Oregon
  • Car Year:1995
  • Car Number:88

I have a 2000 street miata sitting  on my lift ready to put the transmission off to do exactly what you are doing. It has been leaking and I am not sure if its the pan or the rear main. I rebuilt it last year but had to tear it down after I put it together as i has some issues with the rings and pistions. so i am not sure if my issue is the rear main or those two rubber gaskets on each end of the oil pan.


I am hoping that when I pull off the trans its appearent where its leaking. I am hoping its the rear main, much faster to  do that then to pull the pan. But I will be ready to drill and tap that sucker.

For the ammount of work that it takes to replace a trans compared to pulling the motor, for me personally, it's woth it to just pull the sucker, bolt it to the engine stand and do it right.  I  don't know if anyone remembers my debacle last year where I rebuilt my motor, found a leak, remvoed it and resealed the pan, still leaked, realized I was missing the oil pump o-ring so I R&R'd the damn thing for a 3rd time in about as many weeks.  (Still quite a strong little motor BTW being a stock resurfaced block with an E-Street head) .The tearing into the motor part wasnt the major pain.  At that point you' can work in a more or less ergonomic position.  Clean up the oil, turn some bolts, add some sealant.  The major pain was the whole getting the motor in and out.  The  tearing into the motor part was messy but not lying on your back with a flashlight messy.


Donor - Made PayPal donation Bona fide - A bonafide Spec Miata driver We have a Winnah! - Won their 1st race... Congratulations!


0 user(s) are reading this topic

0 members, 0 guests, 0 anonymous users